Will do. It should be a pretty straightforward installation, but I’ll have to move the solar panel for the flue. I wanted a nice dry heat that’s versatile in terms of fuel type. Will probably use charcoal briquettes most of the time.
It depends on the fuel. Soft woods like pine 20 minutes, hard wood like oak longer, Presta log longer still, charcoal briquettes a couple hours, peat about the same as charcoal, bituminous coal probably longer than charcoal, and anthracite coal even longer. Can also slow the burn rate by adjusting the damper.
I’ve actually got a spot in my build that I’d love to toss something like that in, but honestly the “insulation” part of it keeps me from wanting to try.
I see some people just put tile, or even that metal shingle looking stuff, but is that enough?
What were your plans for it? (As far as keeping it from burning stuff, I mean)
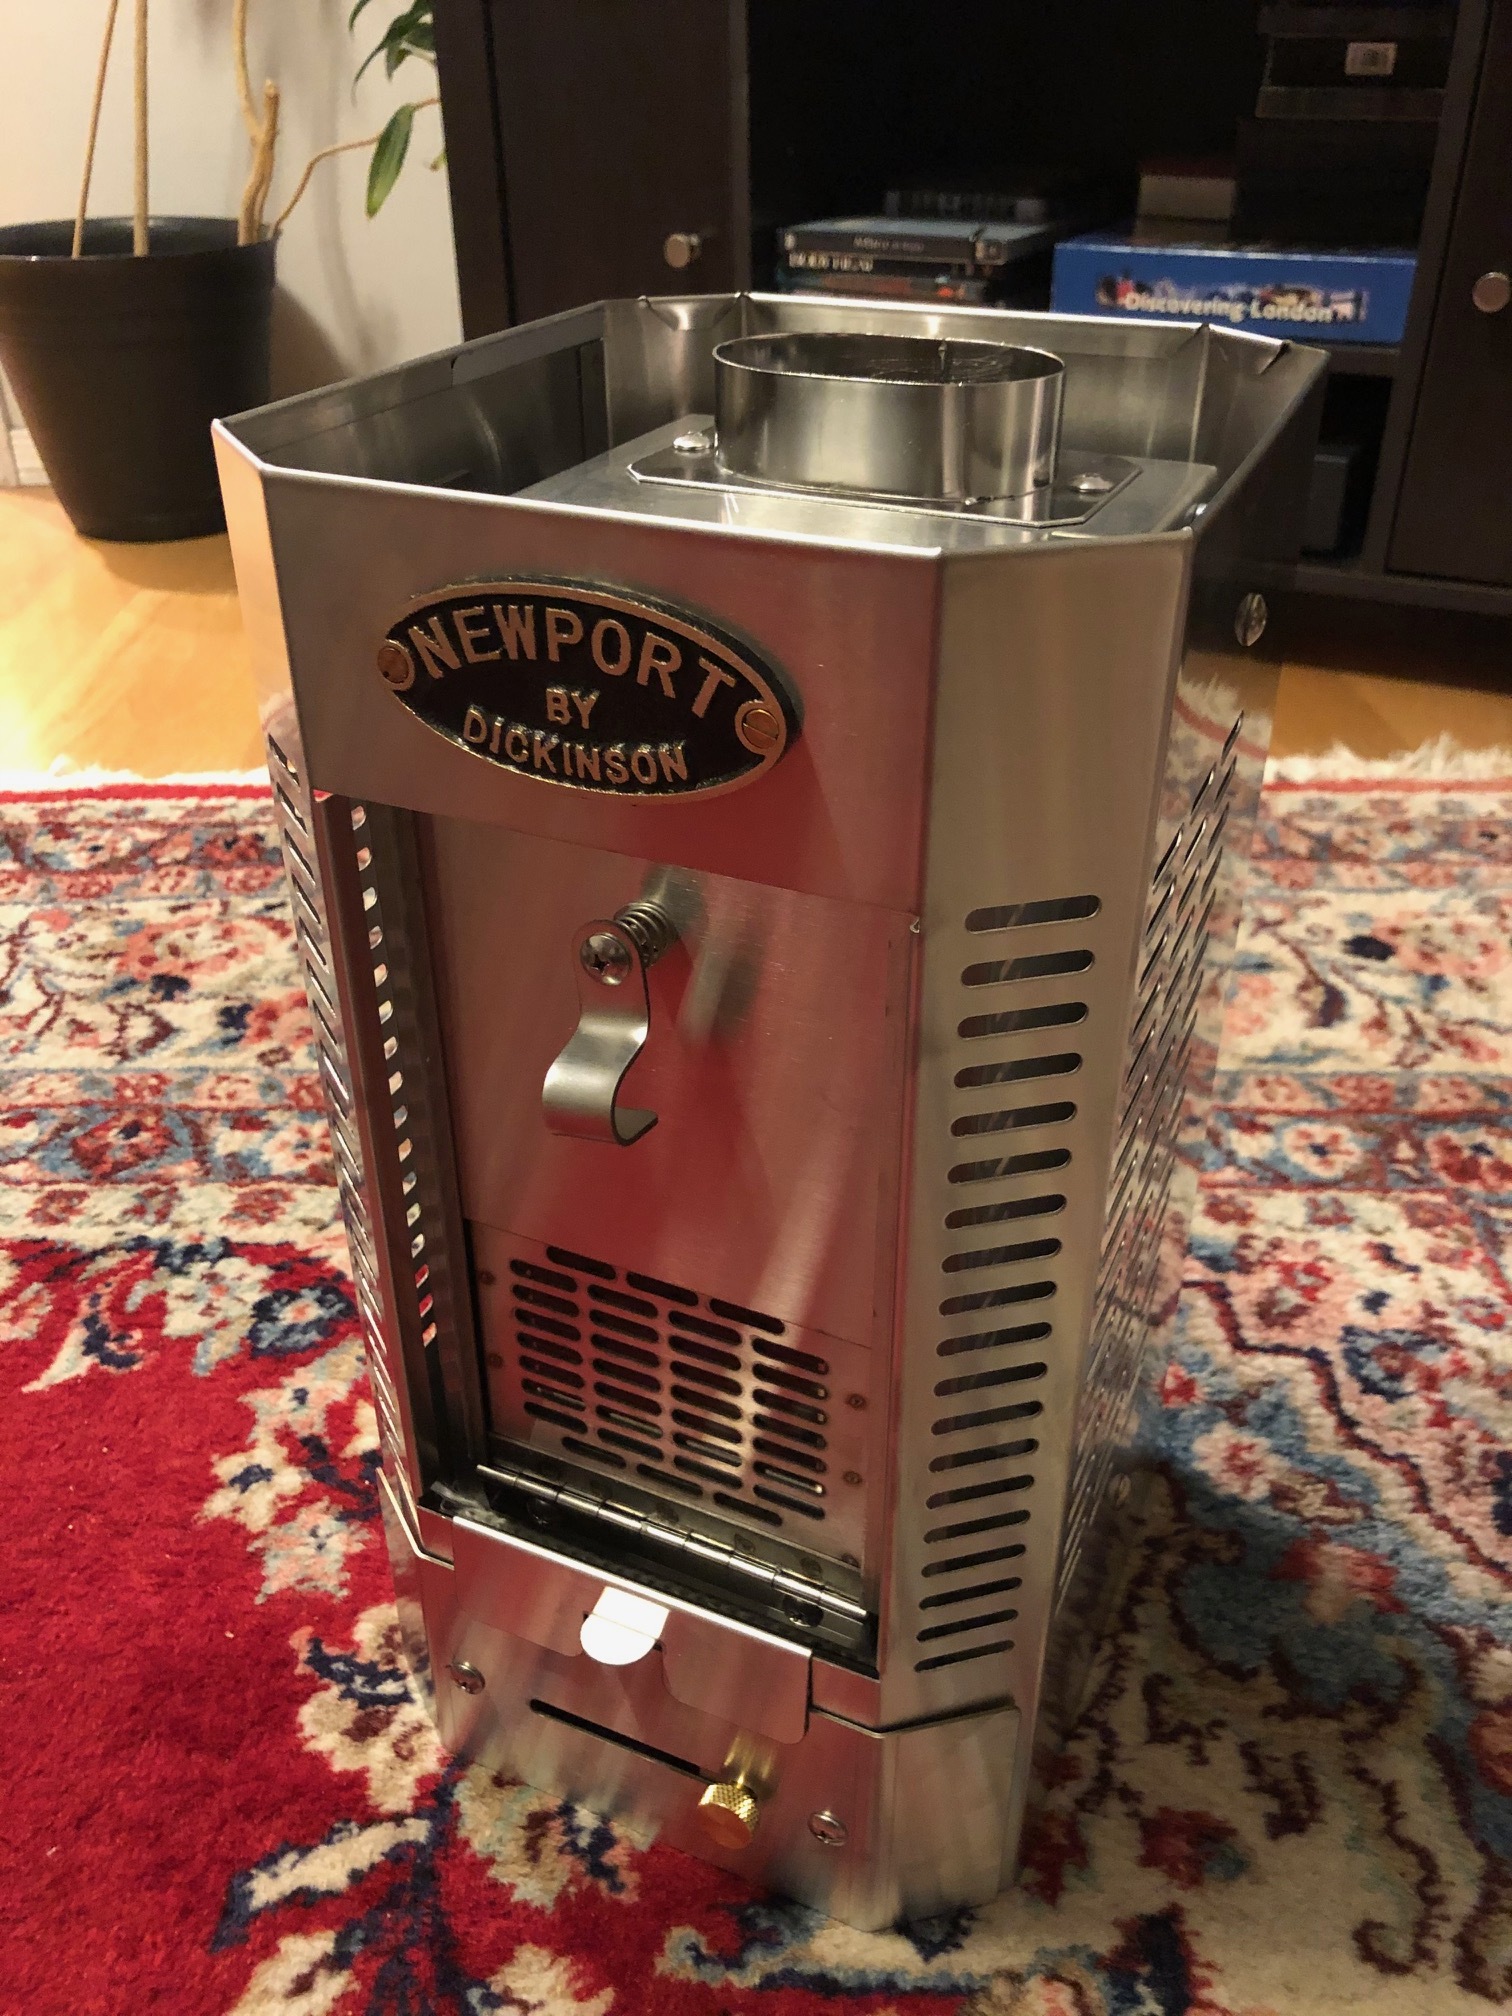
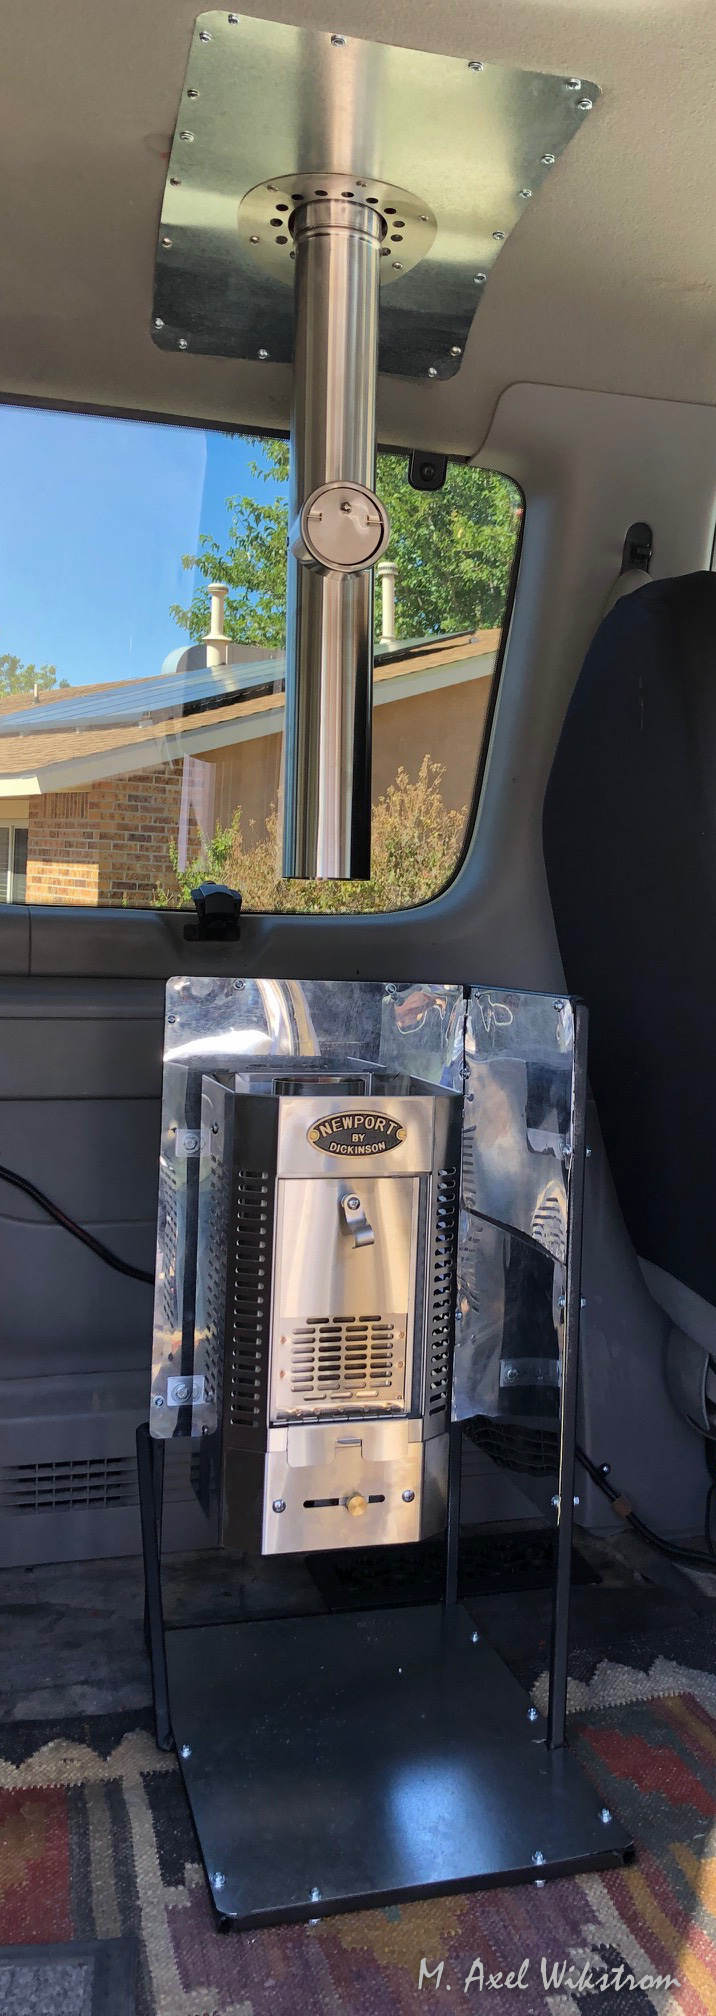
I’ll be welding together a frame to mount the heater at the correct height for the chimney parts that I use, and will be using sheet metal mounted to that frame to serve as heat shields (back, and one side where it faces the back of the driver’s seat). The heater comes with detailed instructions for installing in a boat which translates well to a van. Not rocket science. I’ve been using wood heat in my house for years. There’s nothing magic about it - you just have to follow the safety protocols just like you have to follow safety protocols installing a propane or diesel heater. This heater also has a heat shield built-in surrounding the fire box. It’s designed for really tight spaces.
Ahh, very cool. Yeah I’m not really familiar with heaters as I’ve spent most of my adult life either in the Marine Corps or in Florida. So places with snow or even just cold enough weather to really merit more than a change on the thermostat, really is beyond me, haha.
Hmm, well I love the look and if it comes with some great instructions like you were saying I’ll definitely have to consider trying to get it into my build.
Look forward to seeing more of your progress with it!
Yeah, a solid fuel heater requires more attention that a “set and forget” system, but I really like the simplicity and versatility. Not for everyone, but I’m into it.
I didn’t know that “pyrophobia” is a thing, but I guess it is. On other forums there are some pyrophobes who think I’m crazy, and are going nuts about it. Nervous Nellie’s.
This is rad. I’ve seen a few vans and busses with similar heaters.
We looked at this one: https://cubicminiwoodstoves.com/ but my better half shot down the idea as she thought it would smell from opening it and stoking it or adding fuel.
I do find it odd that these are made for boats. Unless you’re running a steam engine for power, where do you keep the solid fuel and waste on the water?
I’ve heard good things about the cubic stove. I went with the Dickinson due to the smaller footprint, and like the more modern stainless look. Also the fact that it burns more than just wood.
I think most people on boats who use them are tied up or at anchor, so access to wood/coal/charcoal and trash is there. Otherwise, offshore if they’re beyond a certain point they can dump the ash overboard just like they can pump their black water tank overboard.
Test fired the heater. Five small charcoal briquettes gives me about 1-1/2 to 2 hours of consistent low heat. I’ll try ten briquettes for the next test. The outer shell and all the controls stay cool to the touch. I’ll install it in the van this week.
LOL. Wanted to fire it by itself before installing. I’ve only tested it with charcoal briquettes, but worked great. With 10 briquettes it put out more heat, but was very controllable with use of the barometric damper combined with the inlet damper. The inlet controls the air coming into the fire box and the barometric damper is an automatic flue damper that works on the principle of flue pressure vs. outside the flue pressure. As velocity of flue gases or temperature increases (both leading to low pressure), the barometric damper opens automatically to let more outside air into the flue. This automatic action slows the flow of air/gases through the fire box, thereby regulating the combustion process. Really slick!
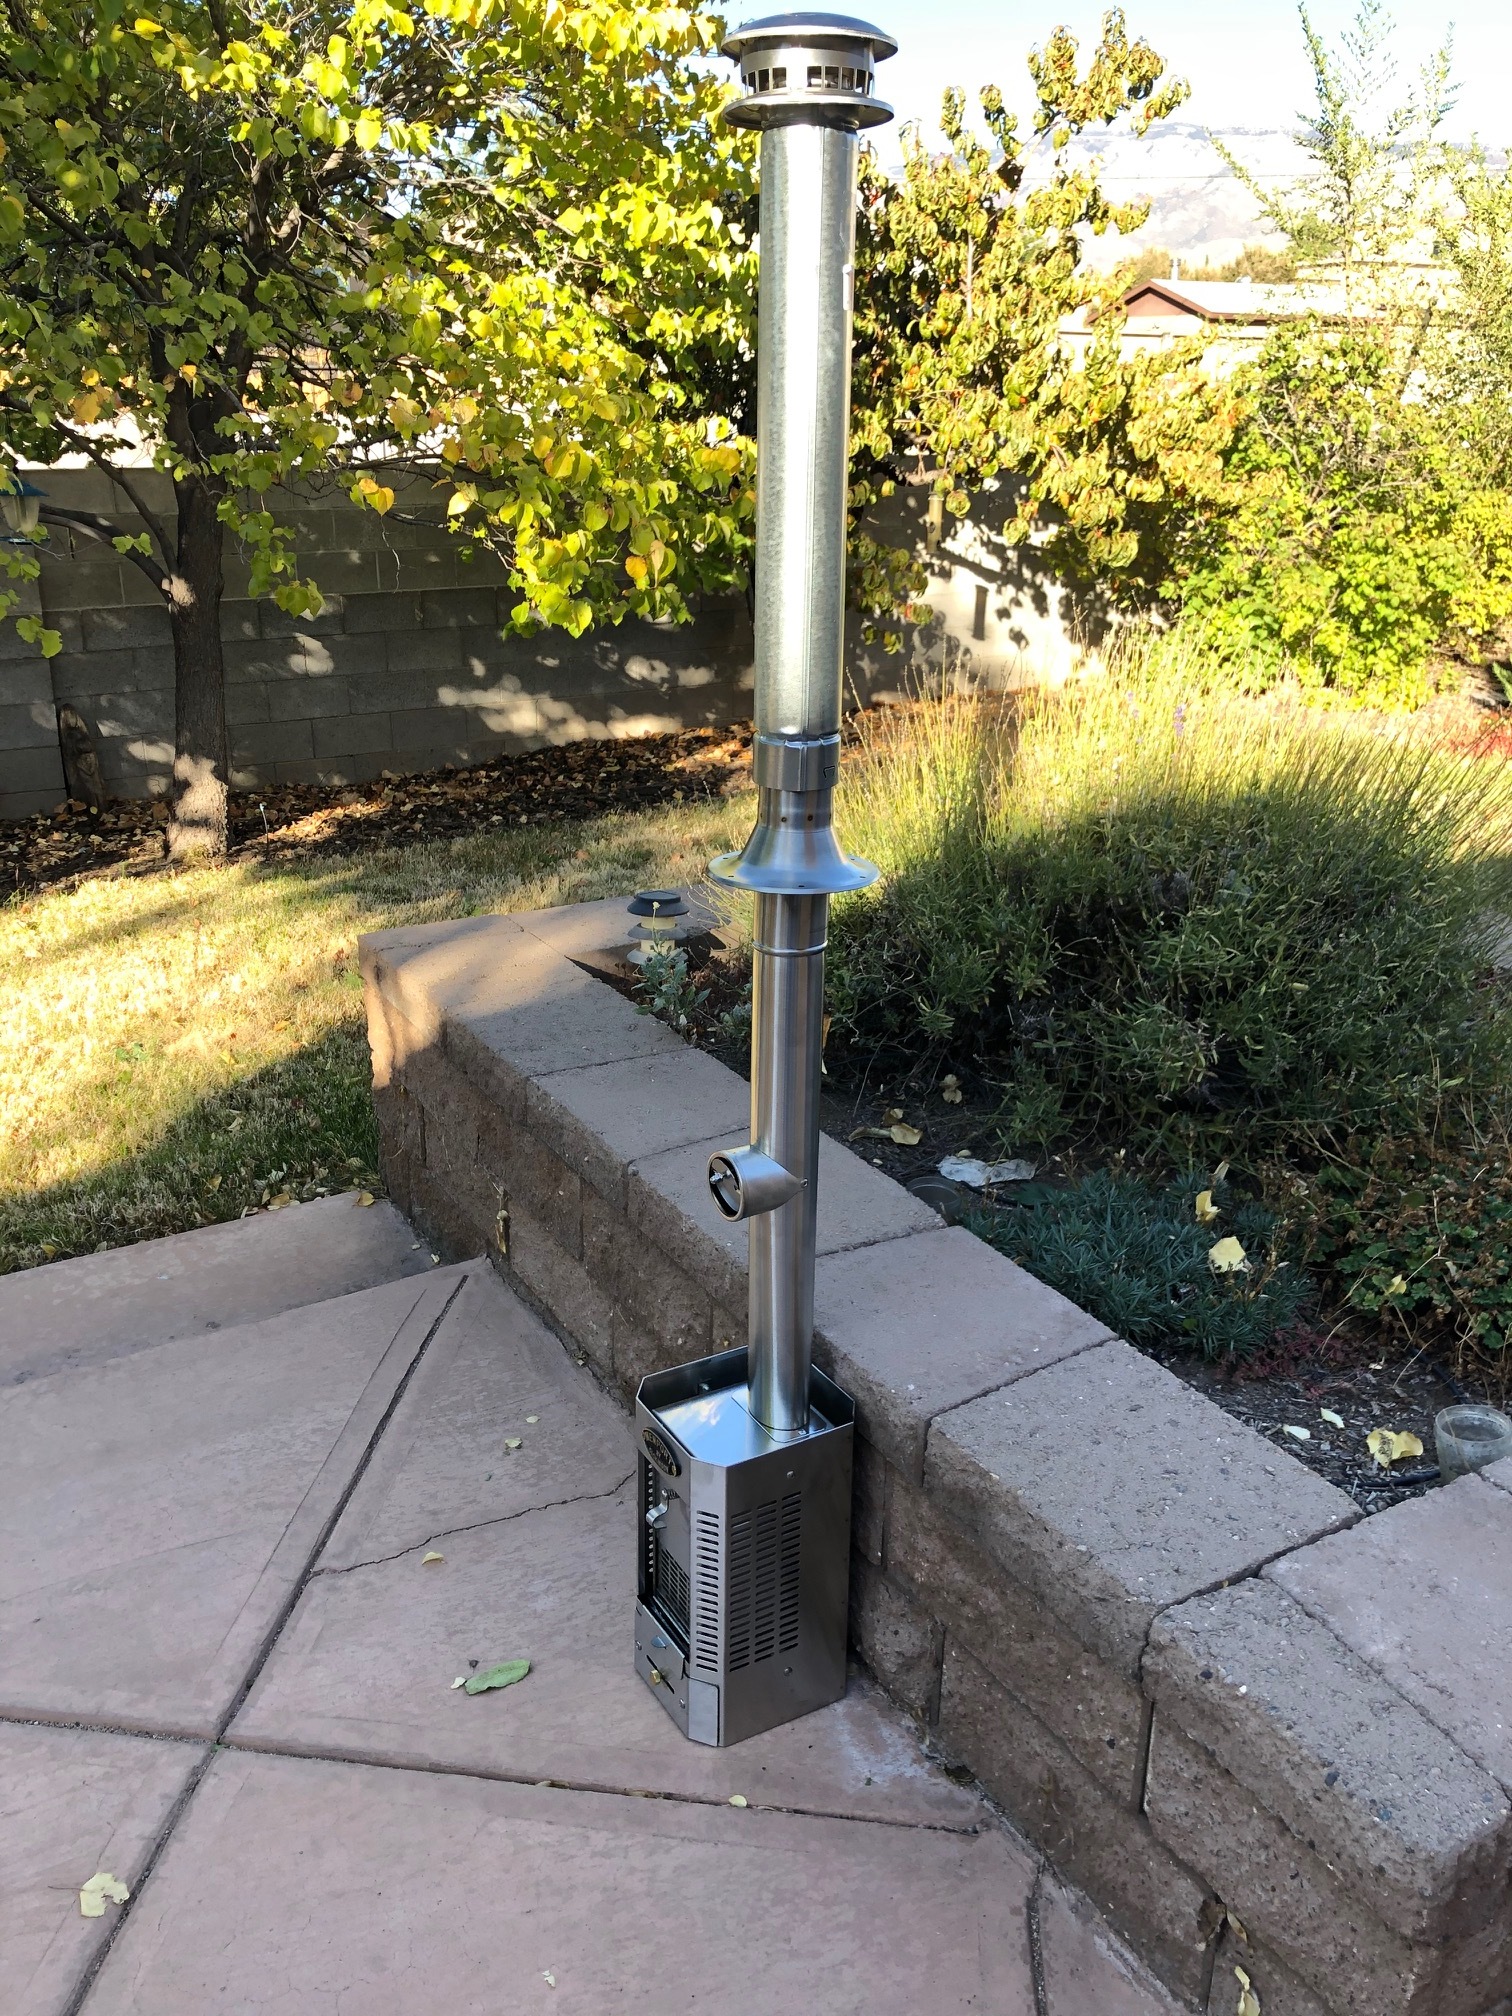
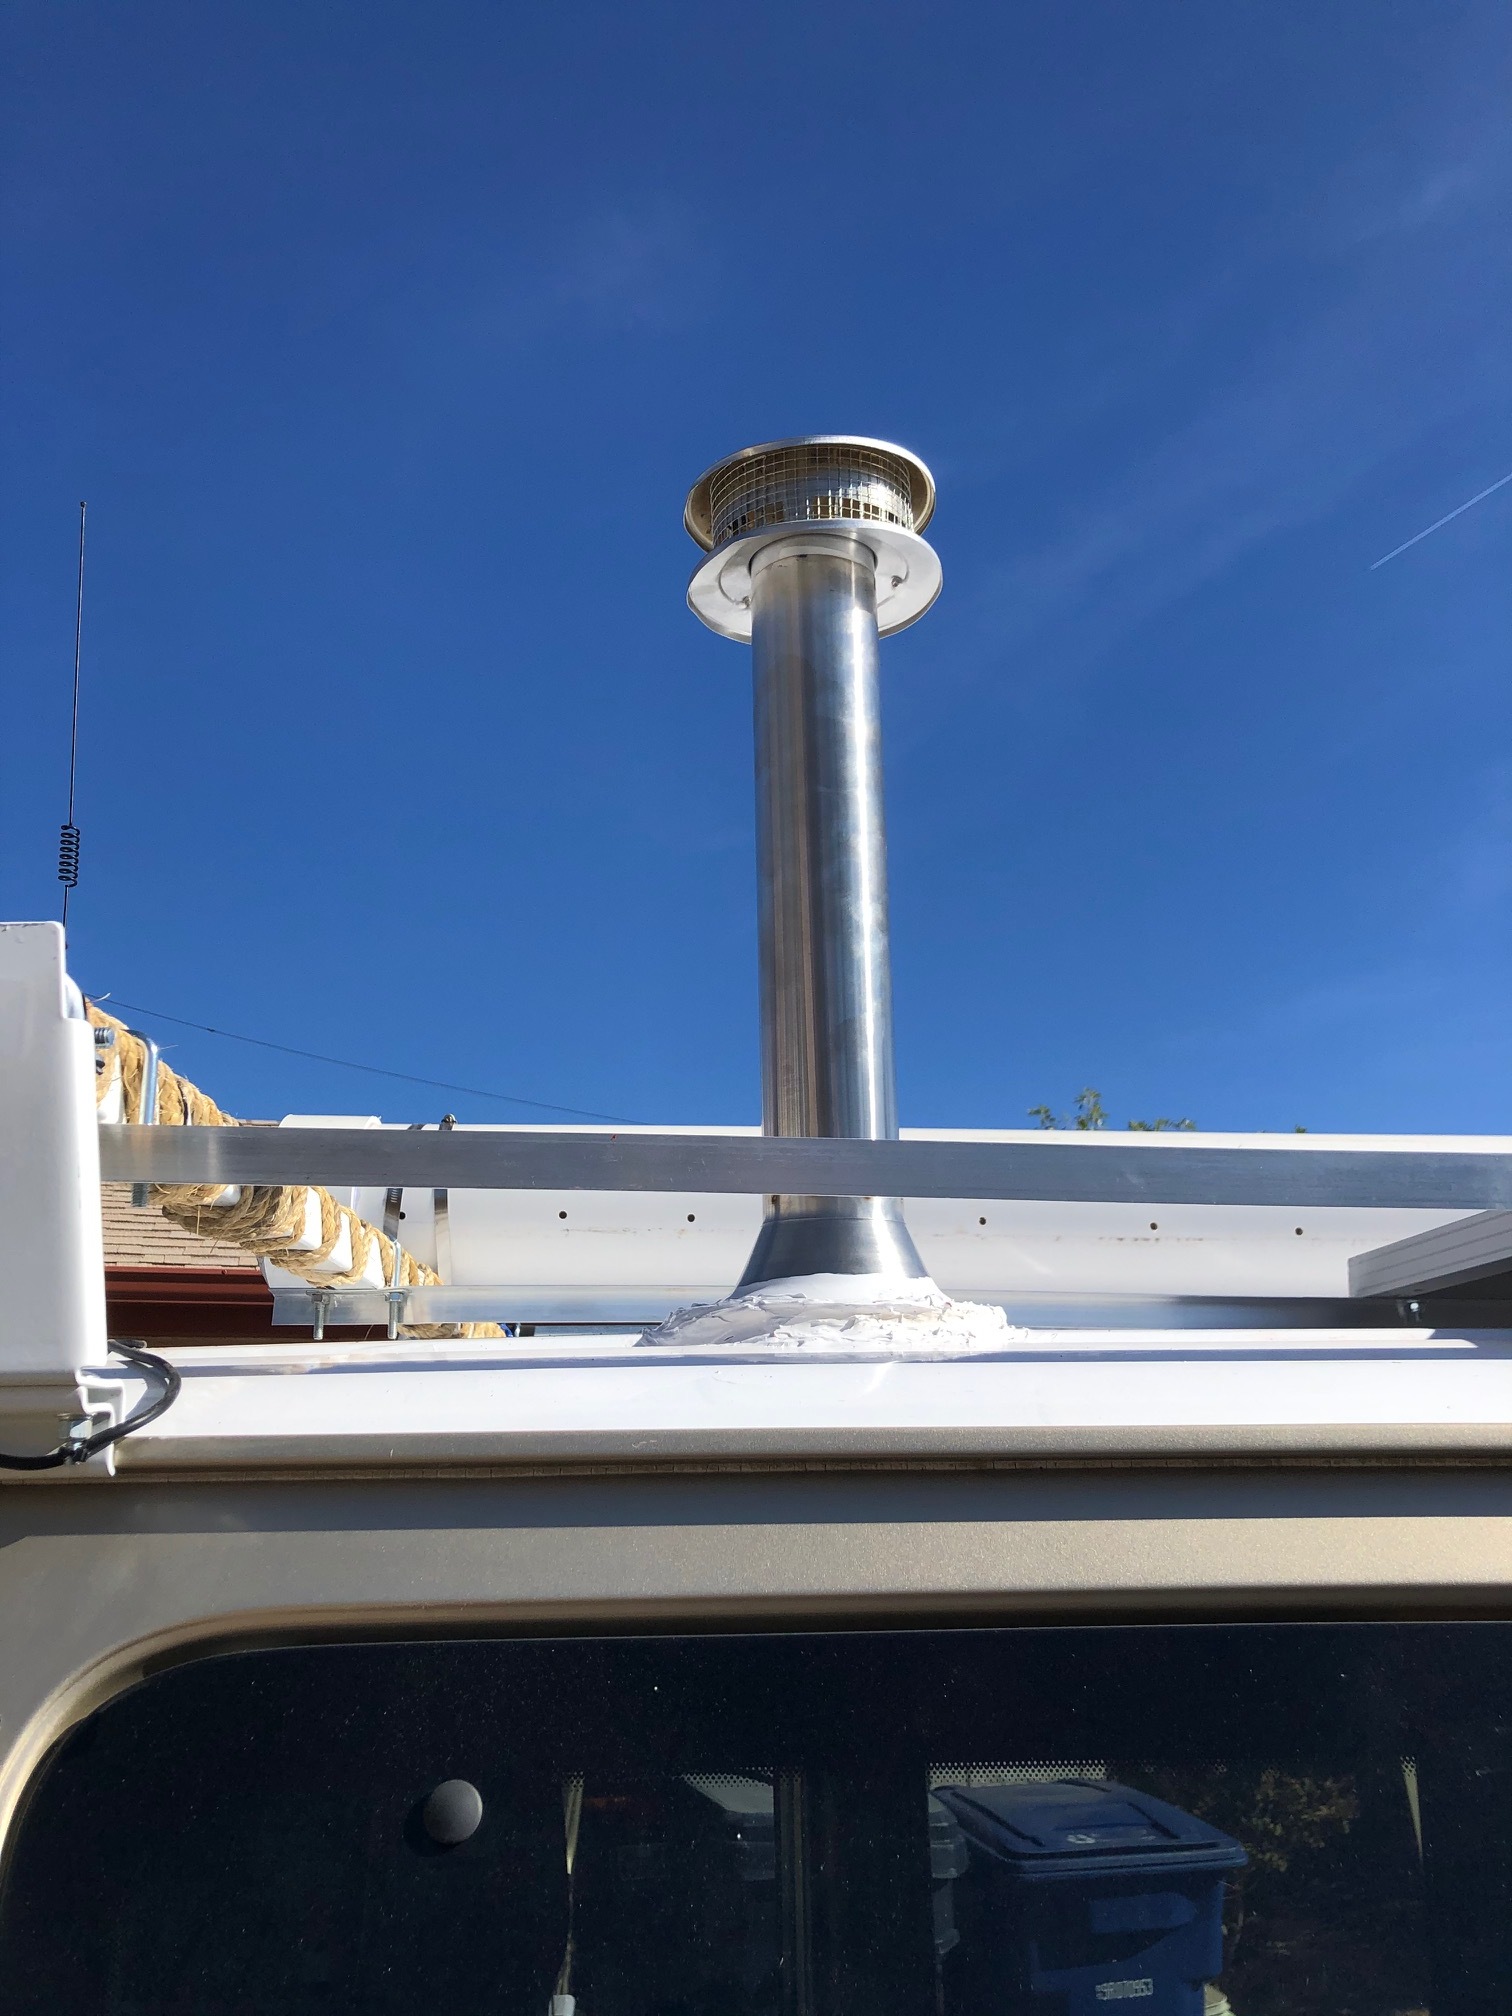
Today I installed the roof penetration, and hopefully tomorrow I’ll get to weld up a frame to mount the heater and heat shields.
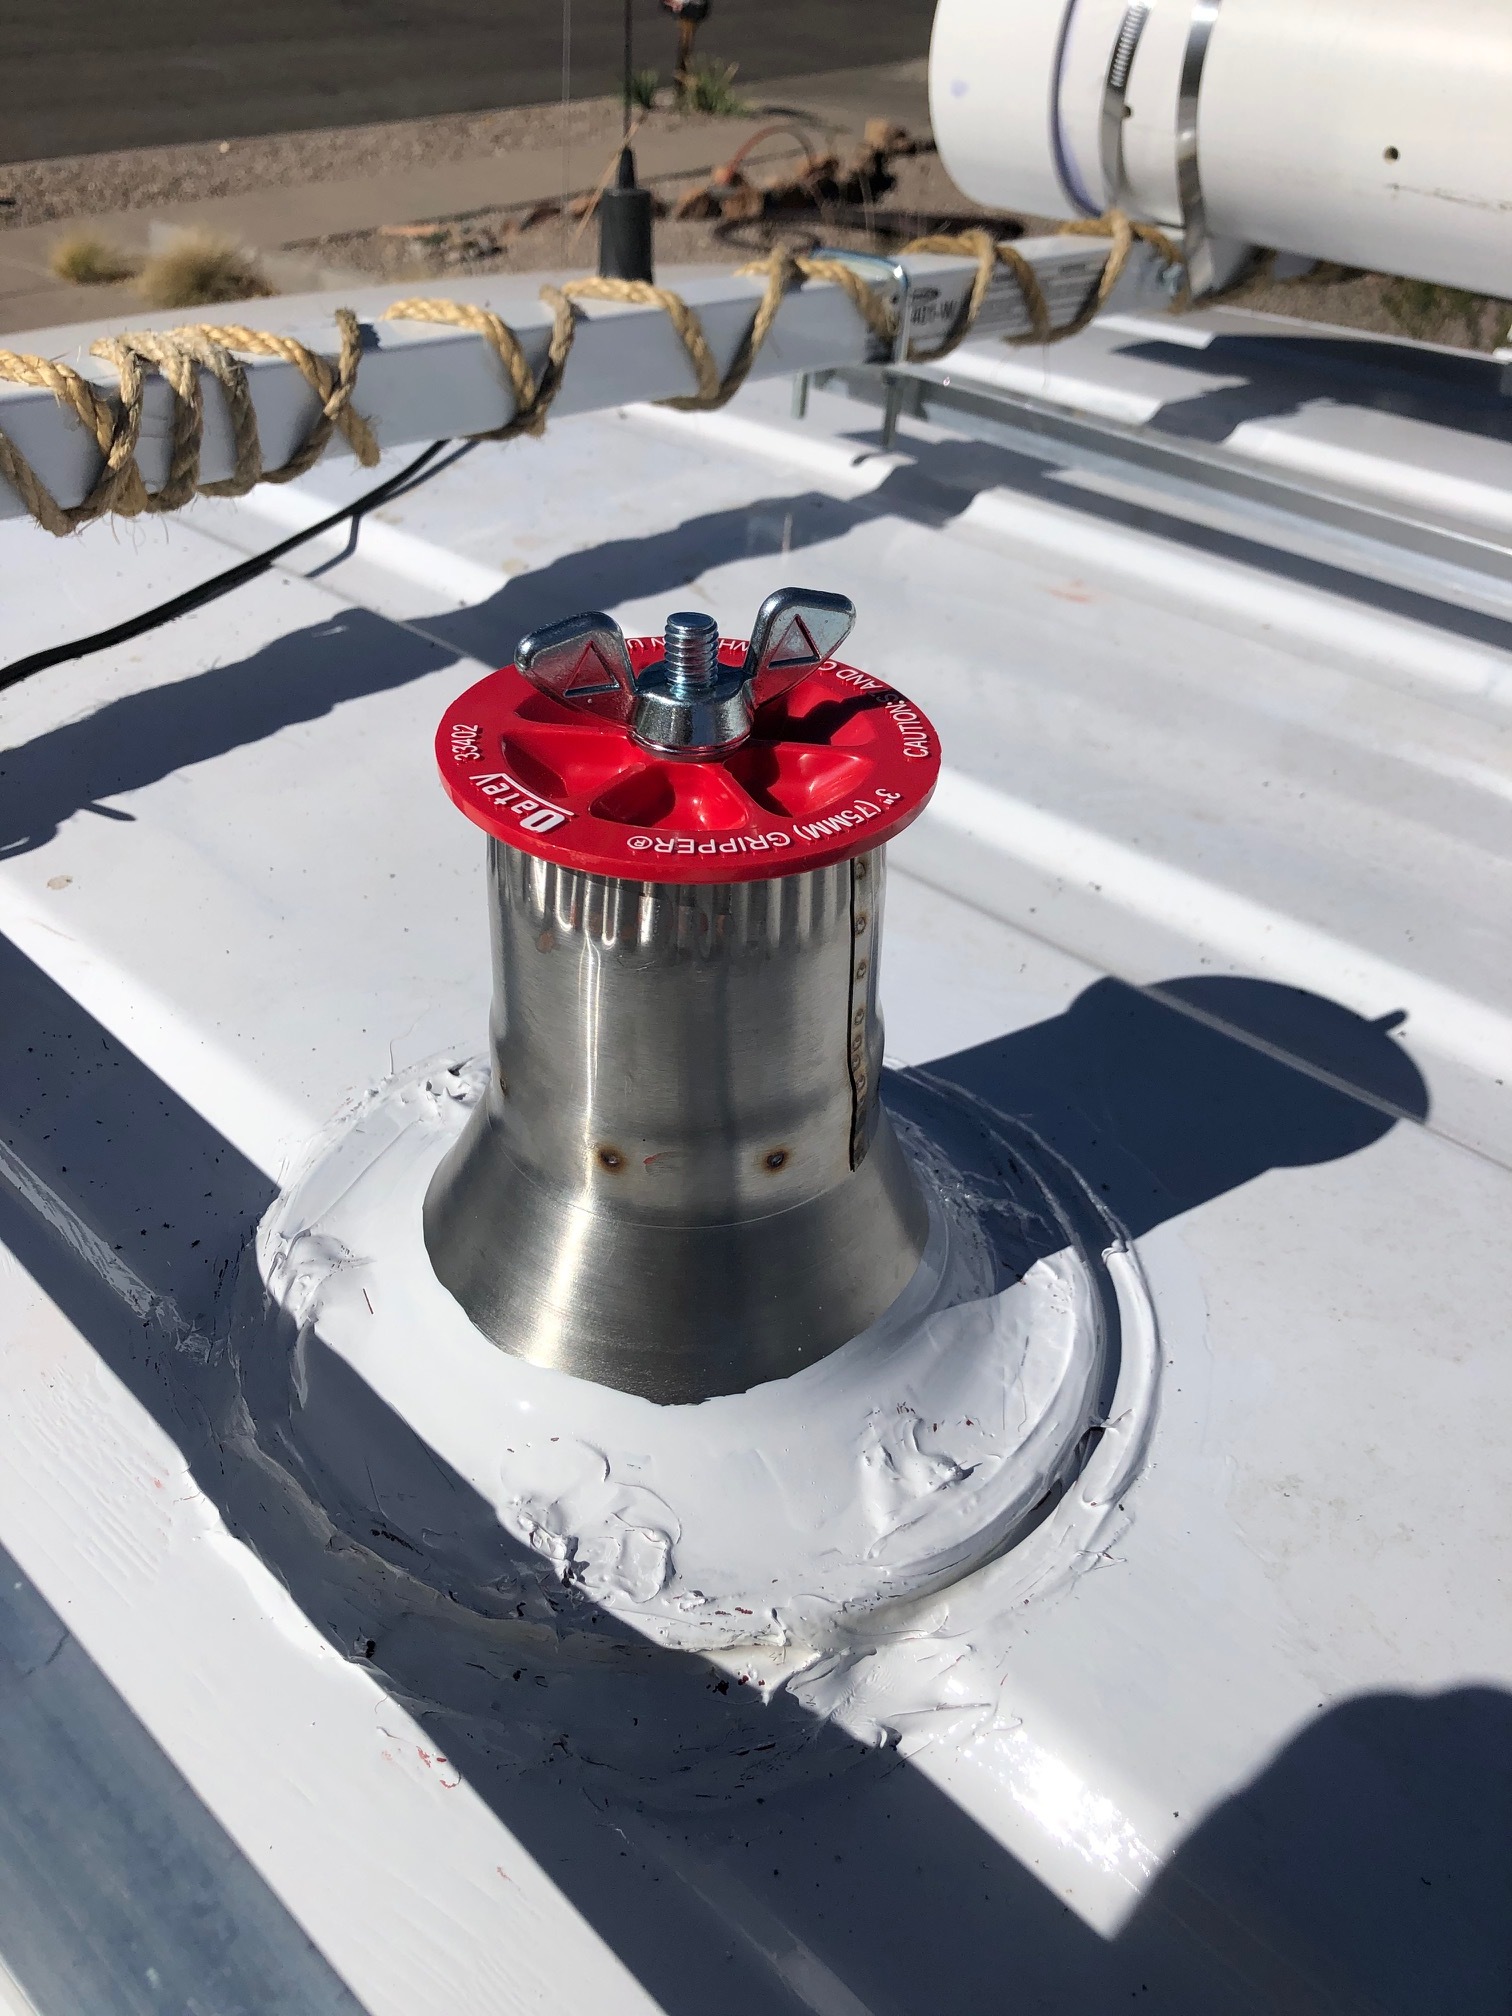
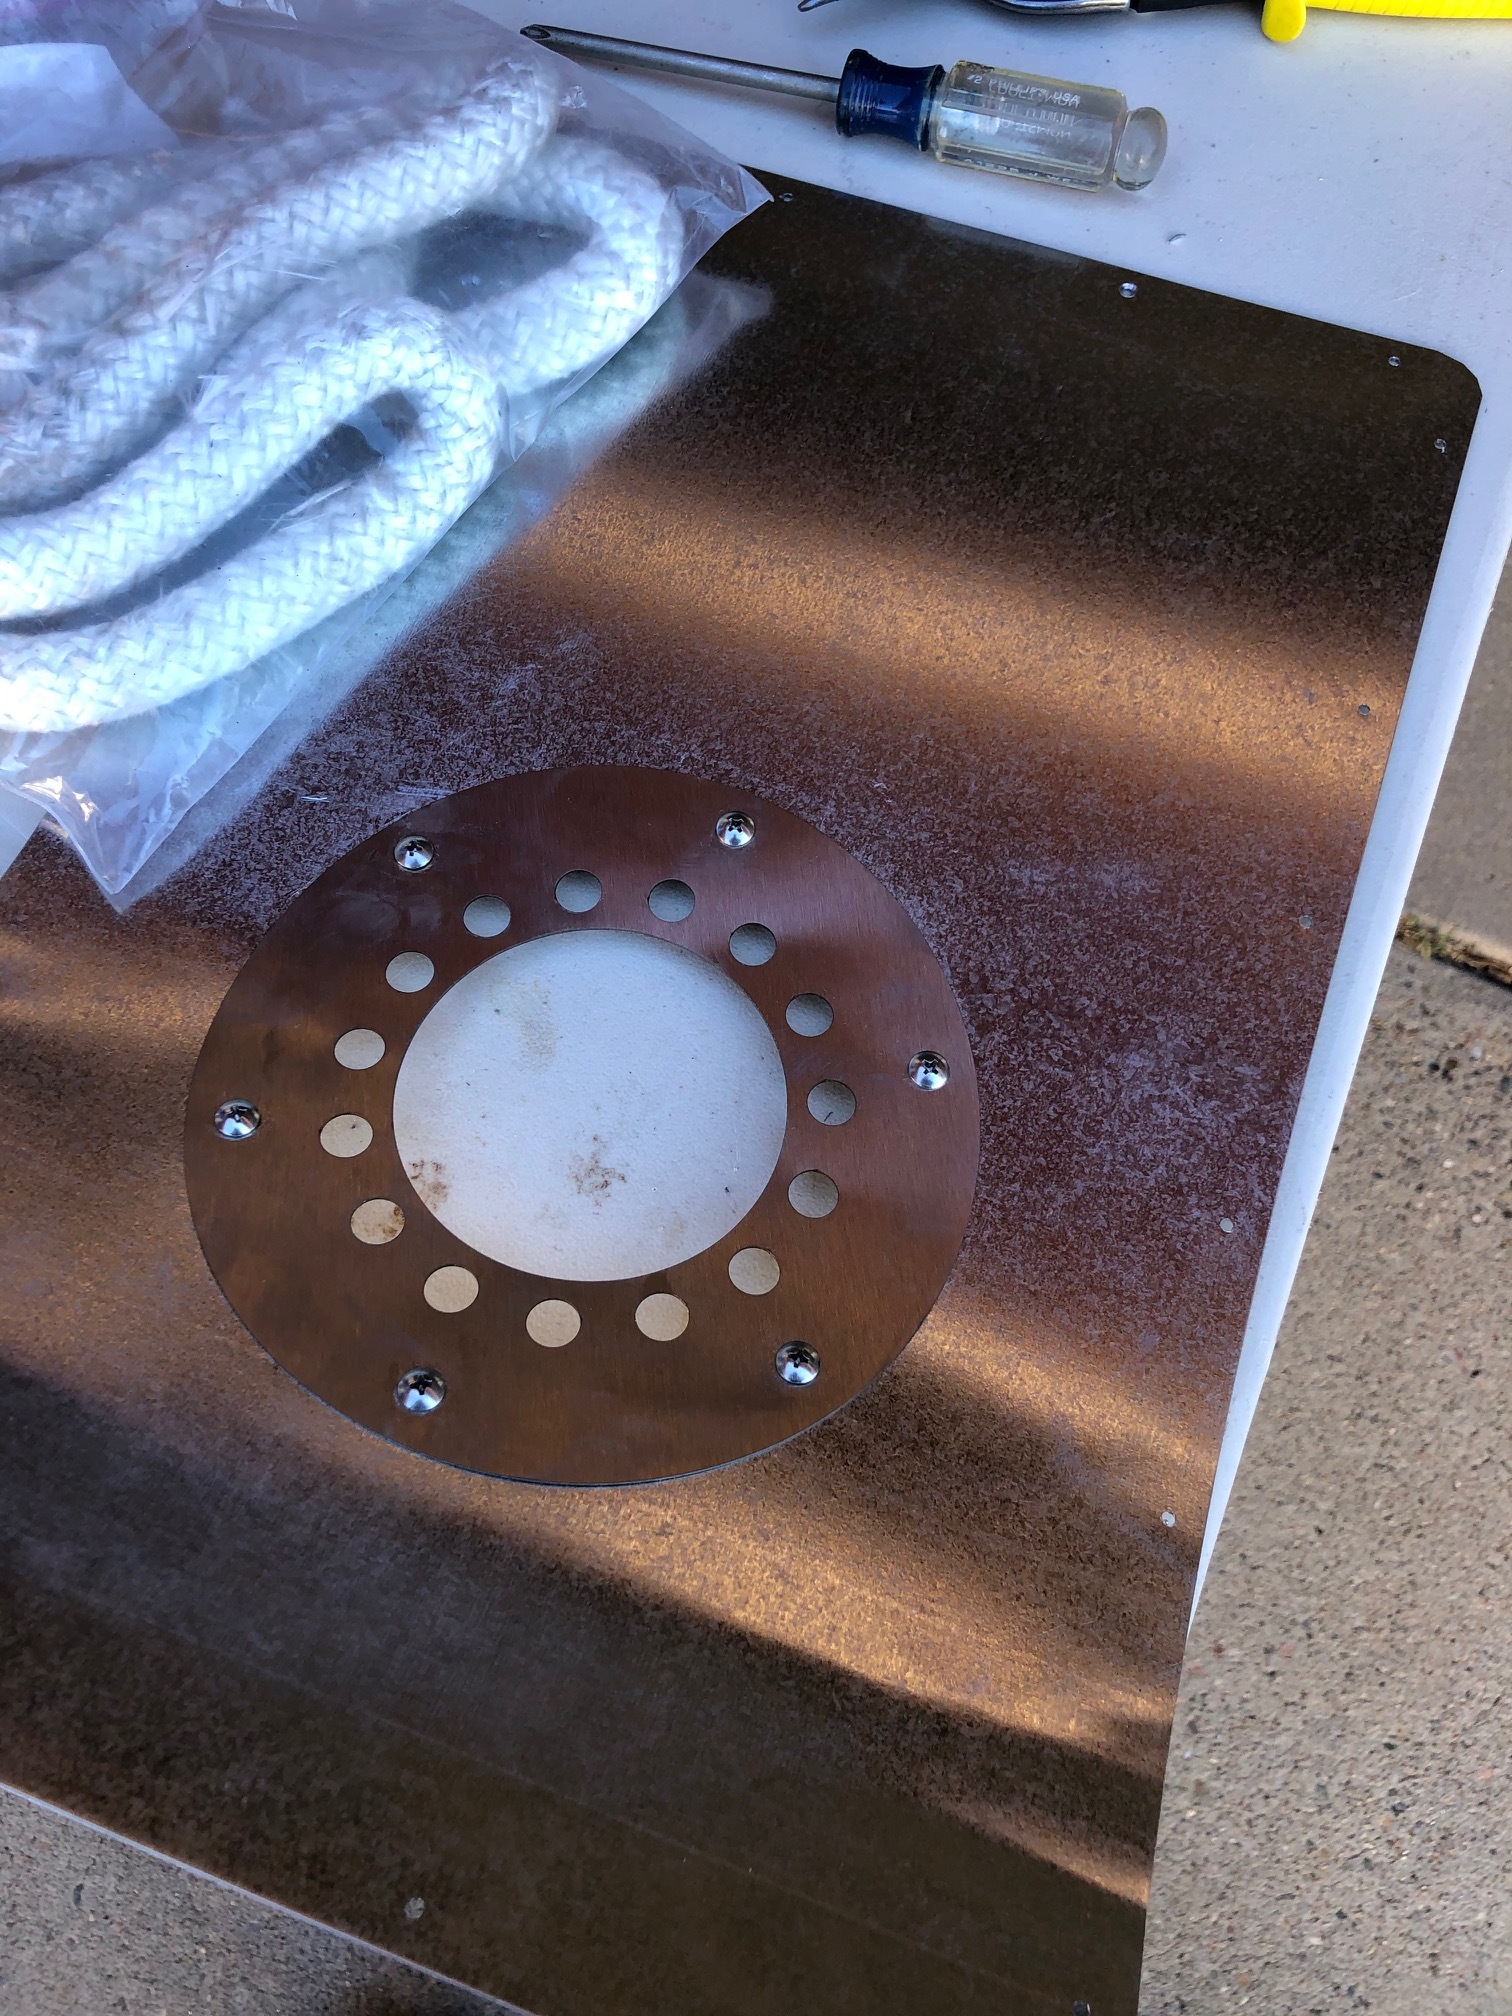
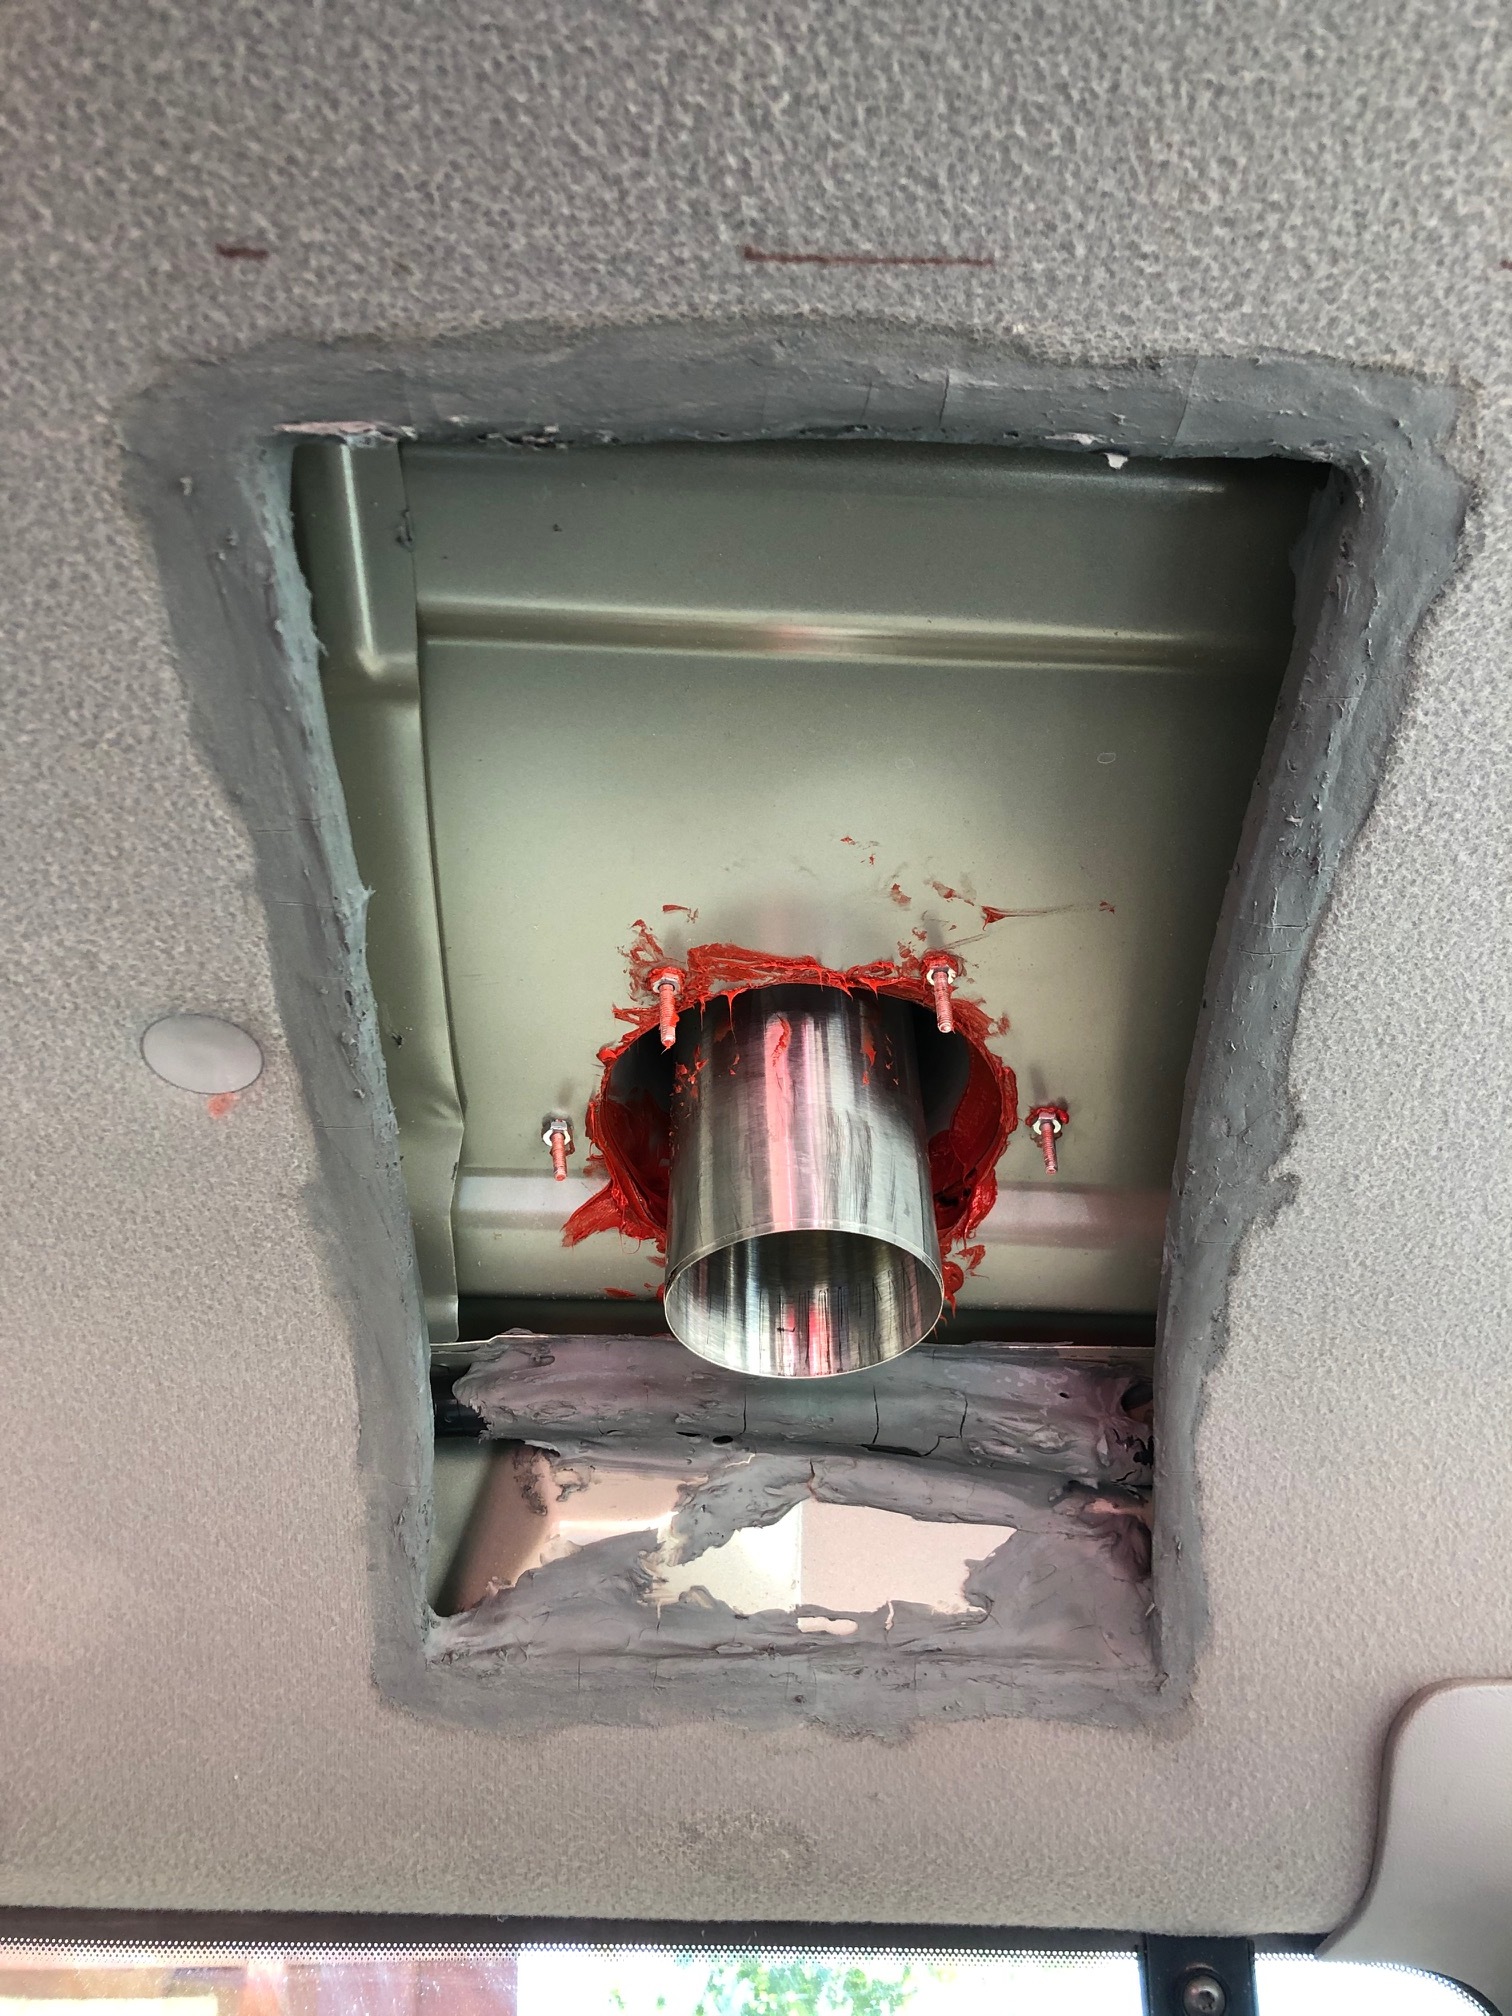
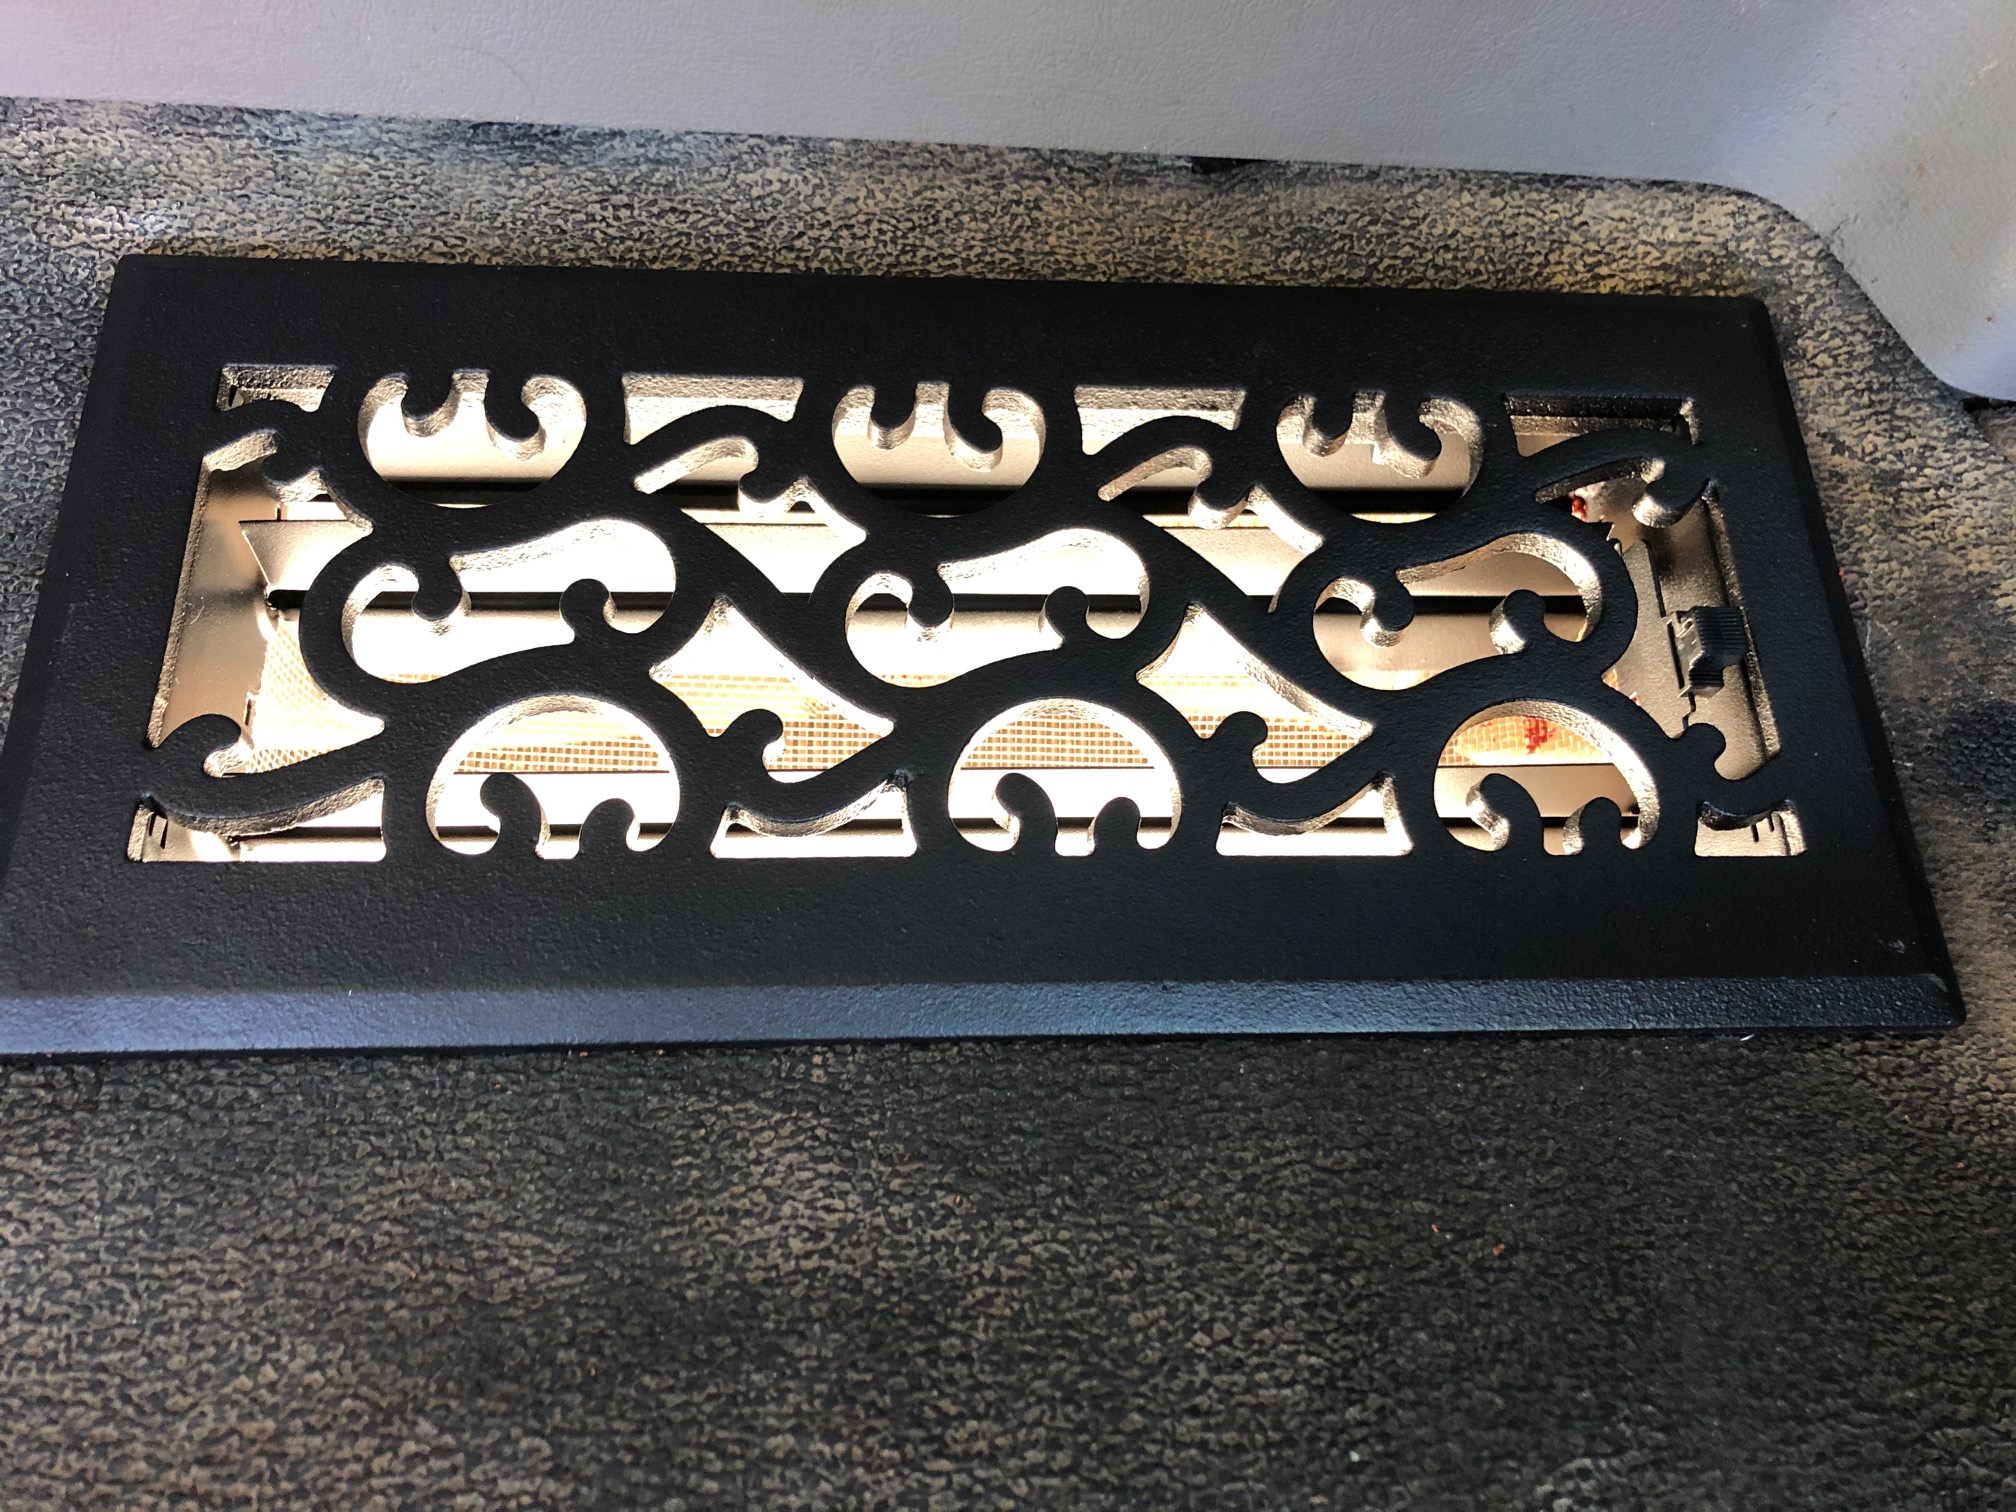
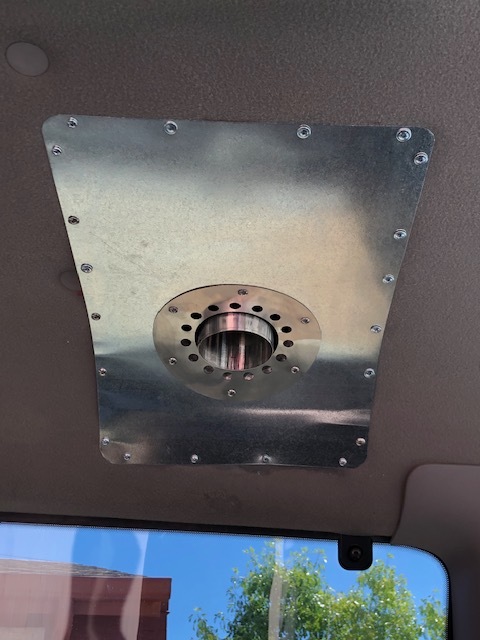
Progress on the heater. I decided to add a little more flue pipe inside the van in order to lower the heater a bit. It was too high for my liking with only the 2 ft between the heater and ceiling, so now waiting for another section of pipe from the manufacturer. The roof penetration went well; The instructions call for 1" clearance between the flue and combustible materials, but I multiplied that by three and then coated the edges of the head liner and anything else not metal with fire block material. In addition to that I’ll be surrounding the flue pipe between the interior flashing and metal roof, 1" air space, with wood stove door gasket material to further protect the head liner. Also fabricated the interior flashing, which will probably go in today. I used high temperature red RTV to seal the roof penetration. To make up for the air that the heater sucks up and out through the firebox and flue, I installed a nice cast iron floor register through the bottom of the van near the heater. Having the air intake close to the heater should prevent cold drafts and prevent back drafts.