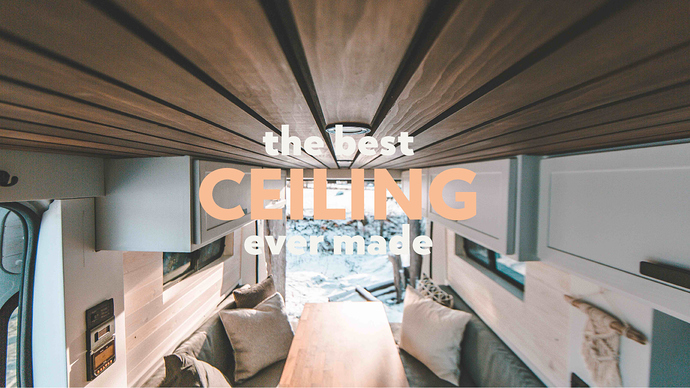
We have to be honest with you guys: we stole the ceiling design from our friends at Native Campervans. Vanlife Custom builds these adventure machines in Colorado, and the ceiling in their Biggie is A.Ma.Zing. Great people. Great vans. Fun times.
Since we launched the Vanlife Sagas account on Instagram, we received many requests about that specific part of our build. So here is the full recipe for your next van’s ceiling.
INGREDIENTS
- 2x, 1/4", 4x8 Plywood Pine Standard (good on one side).
- 11x, 1"x3"x10’ Pine Slats.
- 1x Behr Black paint.
- 1x bottle of MINWAX, Interior Wood Stain - Dark Walnut.
- Sanding paper, G150.
- A nail gun.
INSTRUCTIONS
- Make coffee.
- Plan. Since all vans are different, you’ll want to make sure where you want your ceiling to go. / In our van: the ceiling had to go in between the cabinets (there is nothing behind these) and we wanted the lights to be in the center of the ceiling.
- Drink coffee.
- Prepare your plywood. Since the standard size of these planks is often 4x8, you’ll have to do a puzzle to fit these ply in your designated ceiling area. / In our van: the plywood is in three pieces of various width.
- Paint your plywood planks black. It’ll make the wooden slats stand out.
- Sand your Slats. Since you’ll be staining them later, you want the stain to sink into the wood evenly.
- Stain your slats. Now, this part can be tricky. Do not put too much. Put a drop of MINWAX on a piece of linen, and swipe it across the wood promptly. If you put too much, the pine will turn black.
- Drink coffee. Let everything dry.
- Assemble the plywood and make sure it fits in the designated ceiling area. You will probably need help here: playing with a large piece of wood is never easy. Confirm your ceiling area and take plywood back in the workshop.
- Nail the stained pine slats to the plywood, starting from the center. You will want to leave a 1/2 inch gap between each slat. Make sure all the gaps are even. (Trick: use another piece of 1/2 wood to space everything out evenly).
- Cut the slats AND the plywood where the lights go with a hole saw.
- Install the ceiling. Depending on your van, you’ll want to screw your ceiling to the existing cross members of the truck. / In our van: we screwed wood braces to these cross members to make sure the ceiling’s screws could hold the weight.
Enjoy with friends and family with a cold beer, or when waking up after a good night sleep. After all, your ceiling is the first you see when you wake up, and the last thing you see when you go to bed at night. Might as well make it look good AF.

