Got my Vehicle! (1999 Ford 7.3L Shuttle Bus)

Ok this is the first time ive seen a taped outline like a potential crime scene. That is brilliant. It looks great so far, cant wait to see the progress. We all have plenty of time right now.

1 Like

Hey all!

I’ve made a bit more progress, but not really as much as I’d have liked. Thanks to all the Corona stuff it slowed down a bit for me, between self isolating and trying to order certain things from Amazon, it’s just been a bit slow.

But I do have some progress to share!


In this image, you can see the over-engineered bedframe as well as what originally was going to be a “half shower”.

For the bed frame, I have a bad back and constantly toss and turn. Sometimes during the night I will literally “whale jump” and turn in the air to reposition myself, haha. So I wanted something that I could really put through its paces, so it is a bit “heavy”.

For the “half shower” (the thing on the left in this picture), I really just didn’t want to give up any windows. I wanted the most out of the “360” view I could get, but then really thinking about the setup I had planned I knew I just wouldn’t be happy. So instead the “half shower” is now going to be a cabinet and I’m going with an actual shower stall in a different location with a recirculating system that will super duper filter the same 10 gallons, requiring me to replace it only once a week or so. It will also have a tankless water heater running heating from propane, the whole system should have a flow rate of 1.5 gallons so it will almost be like a shower back at home.

For this part I’m actually having my Father help me, who is a Master Plumber with 30 years of experience and owns a pretty successful plumbing company. Truth be told, for something like this, dealing with water and especially “dirty” water, I would personally recommend getting a professional. Just my opinion. Although he thinks this design is nuts, at least I know the “quality” of the system will be solid, haha.

The whole time I was weighing out the “half shower” or the recirculating one, I kept thinking of something I saw @Van_Dweller say. (Paraphrasing here) “The more complex, the more difficult it will be to fix on the road. The more simple, the easier to just replace”.

I know this system is most definitely the first one, it’ll have more “doodads” than the original design, but I just had to give it a shot. Worse comes to worst, if it dies I’ll just rip it out and toss that sucker. :laughing:


This is after I got the side panels onto what was going to be my half shower with a fold-down top, now it’s going to be my main storage spot for “day to day”. I literally only own a bag of clothes, my toiletries, a laptop, and a set of cast iron pots right now so it’s actually more than enough space. The Shuttle Bus may be new, but I’ve been minimalist for awhile now. Although I am also considering making it a dog house for the pet I hope to adopt before I get on the road… Really just depends.


This last guy is just a shot of me trying to add some “pretty” with birch panels. I’m hoping to do all the walls, as well as the ceiling with them. Might even use them to cover up a bit of the plywood from the other structures. But even though I’d like a little bit of “pretty”, it’s really not my main focus.

I’ve already made the call that so long as the required “systems” are in place by the end of June, I’m out! I can always do some work on the road, but I can’t get back time spent “waiting for things to be perfect”.


For anyone interested in, or researching recirculating systems, this is the design I will be using. I would like to point out two things though.

A - This is not purely my design, I borrowed the “base” from a Youtuber who did the original design. I did however, remove what I considered to be “fluff”, so this is modified from his original plan.
B - While I am giving him credit, I will not link his video because I feel like (pure opinion here) he over-engineered it so that you would use his Amazon Links and spend tons of money. If you google “Vanlife recirculating shower” it will pop up though. He seems like a smart guy though, so it’s also possible that I’m just being cheap. XD

I can/will provide “royalty-free” Amazon links to the stuff I am using at some point, but it’s late and I’m tired / being lazy so I’ll edit them in later. :laughing:


So that’s my update! I hope some of this might someday help someone, like so many others have helped me figure out things during my research. If anyone ever has any questions I’m always happy to share, but just know that I am not a “professional (insert any kind of trade skill here)” and my experience on the road as of this point is zilch.

I hope everyone is doing well and safe during this crazy time of Corona, until next time! :wave:

1 Like

If you wish to maximise space, you don’t really need to build a shower stall inside.
https://www.instagram.com/p/B_QBRQ3Jfn8/

That’s a Canadian company that does van conversions, I’ve seen others make similar shower pans too but usually the pictures aren’t that good. I had this pictured in my mind for my own van before I even saw the first photos online. Pretty much every idea that you can come up with someone has already made similar… :smiley:

btw, check out “hour shower” in youtube. That guy made a filter system from regular parts you can buy from hardware store or amazon, with a replaceable filter. Just an alternative to fancier stuff.

2 Likes

Greetings!

My solution to preserving my 360° view was to use a hula hoop for a shower curtain, and hang it from the ceiling. It is also my toilet surround. When not in use, I just unhook it and it rests on my toilet.

Cheers!


"Stay home, stay safe, and remember social distancing." ~ Van_Dweller


1 Like

Youtube isn’t totally useless.

That is pretty nice work. I alter/add two things: metallic sides for the shower pan and sew/glue magnets into the shower curtain bottom edge so it holds on to those shower pan sides.

Hey everyone!

So it’s been a bit since I last posted, between RL 2020 being crazy and just not making a lot of “visual progress” for a while I just haven’t had much to post.

The last few months have been more “mechanical” than anything, I had the engine looked over, and all the fluids/filters replaced so I could have the start of a logbook for the vehicle. Then I had the AC unit fixed up, new compressor and had some old hoses replaced, runs like a Champ now.

But during that time, I really took a step back to consider the progress that I had made, and what moving forward would look like. It was because of those thoughts, that I ripped everything out and decided to start over! :laughing:

Now, honestly, there wasn’t really much progress inside anyway. I had built a very over-engineered bed, and what looked like a dog house? Truthfully it was because I had rushed trying to get to the “fun part”, actually putting furniture and stuff in. It showed in the quality of the work, and in the safety of the vehicle itself. There would have been very few anchor points (if any at all) and anything about 4 feet up would have been unsecured and a bit of a hazard.

Then there was the matter of the “stuff on and in the walls”, after finding a few leaks I knew there had to be some damage to underlying material beneath the plastic wall covering. Plus, I wanted to find where the ribbing ran along the cabin so that I could build and secure a deck to the roof for the solar panels.

Essentially, I was rushing instead of finishing things appropriately. I started pulling a thread, and then stopped halfway in because I was being lazy.

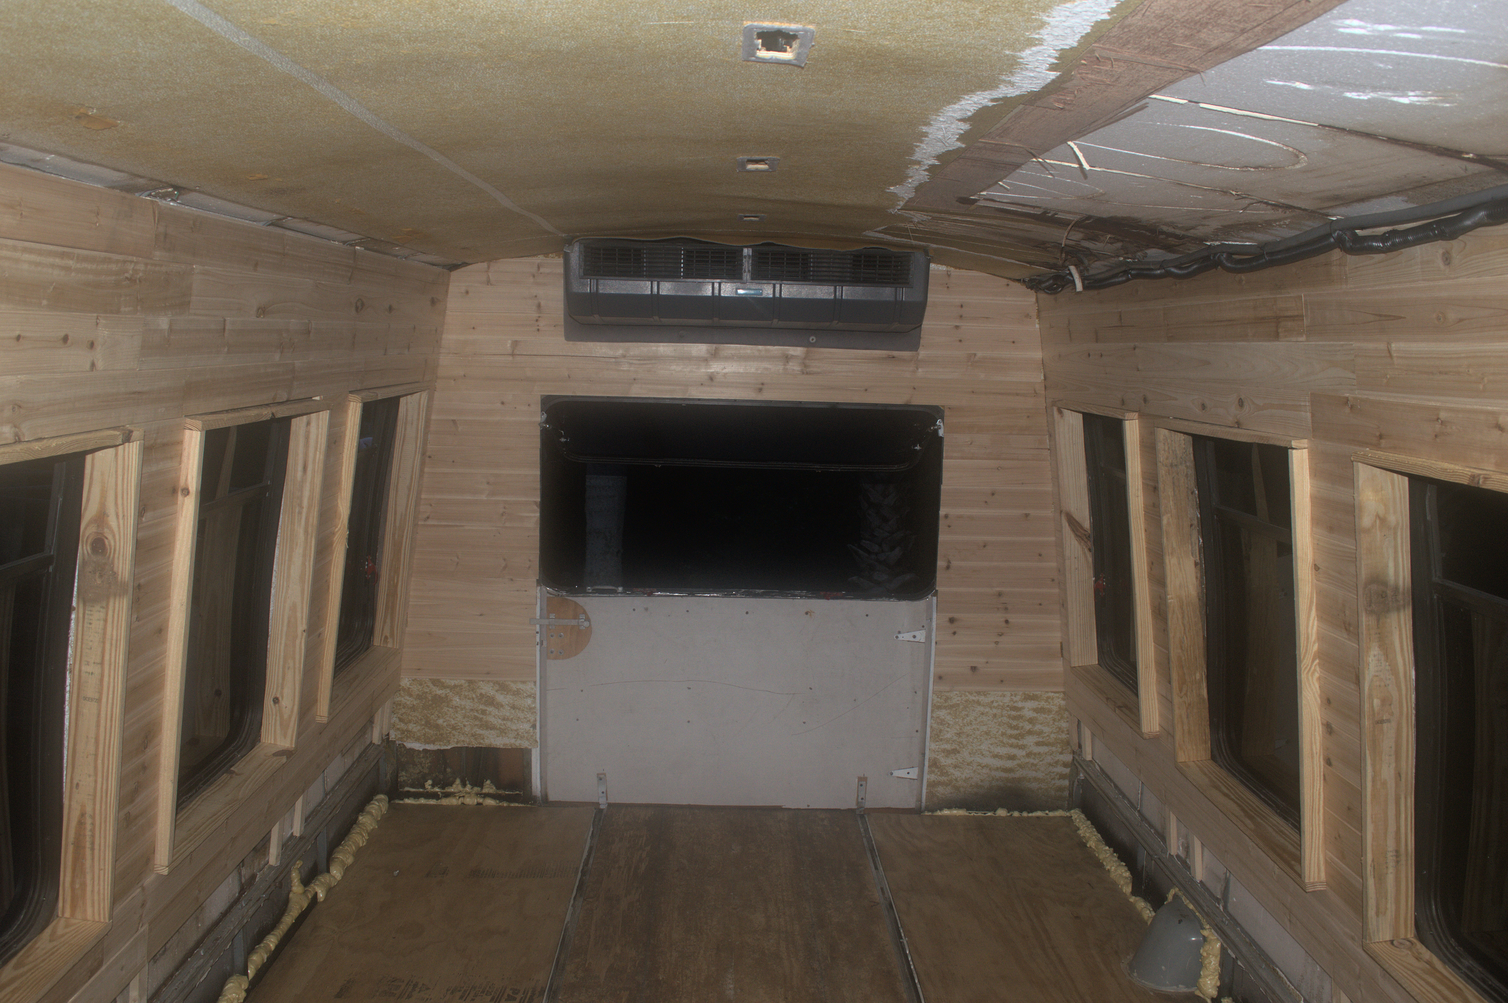
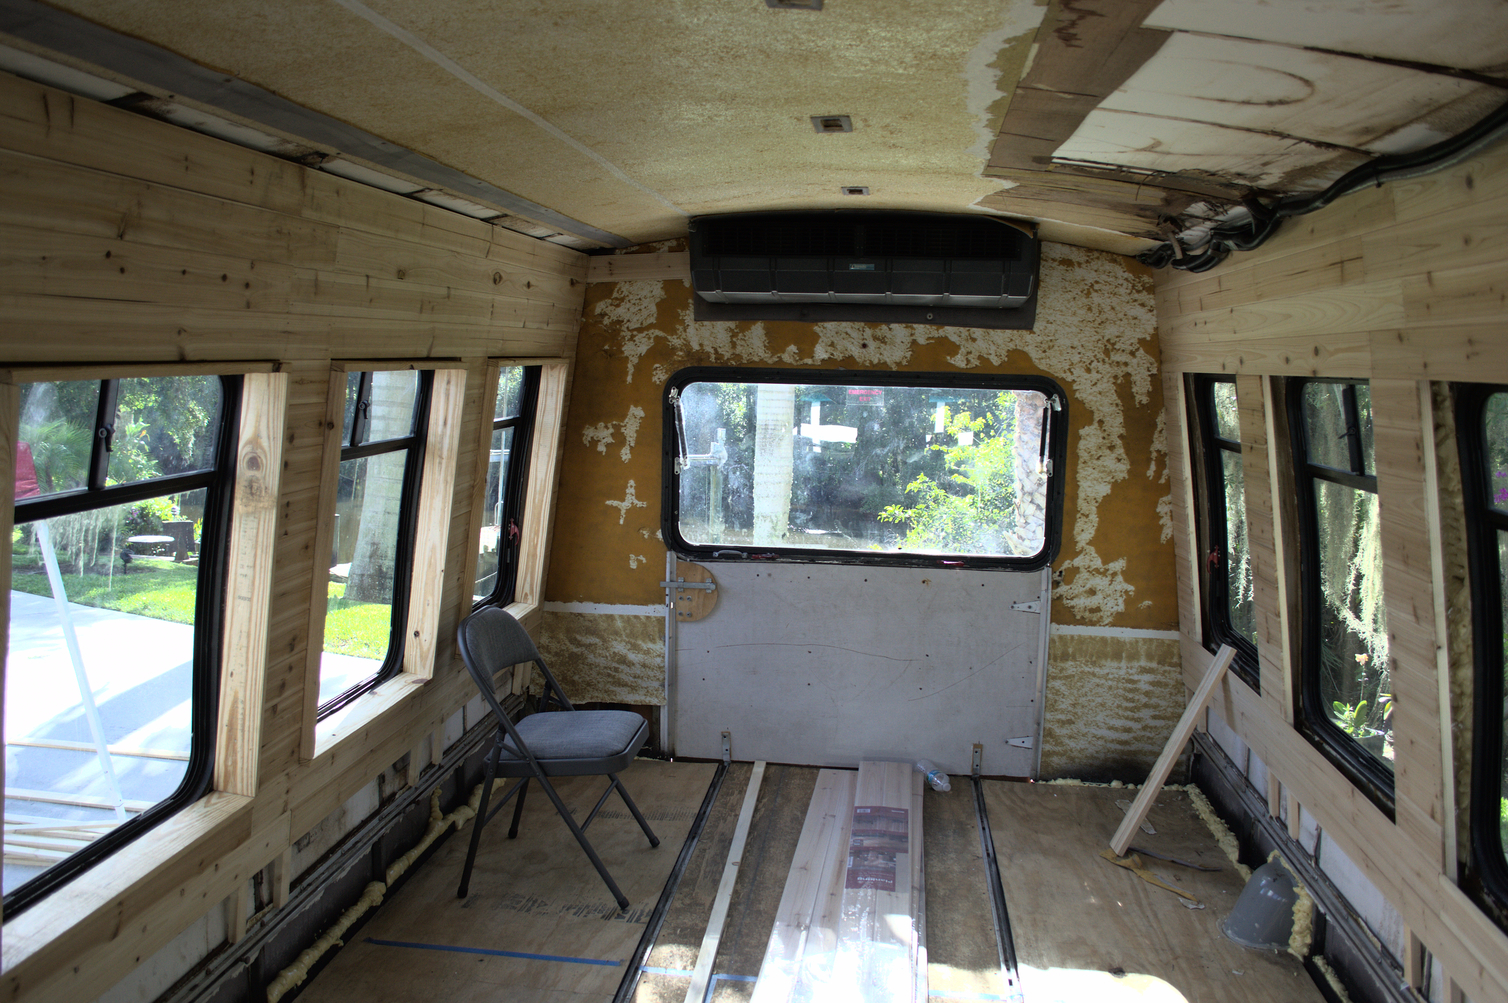
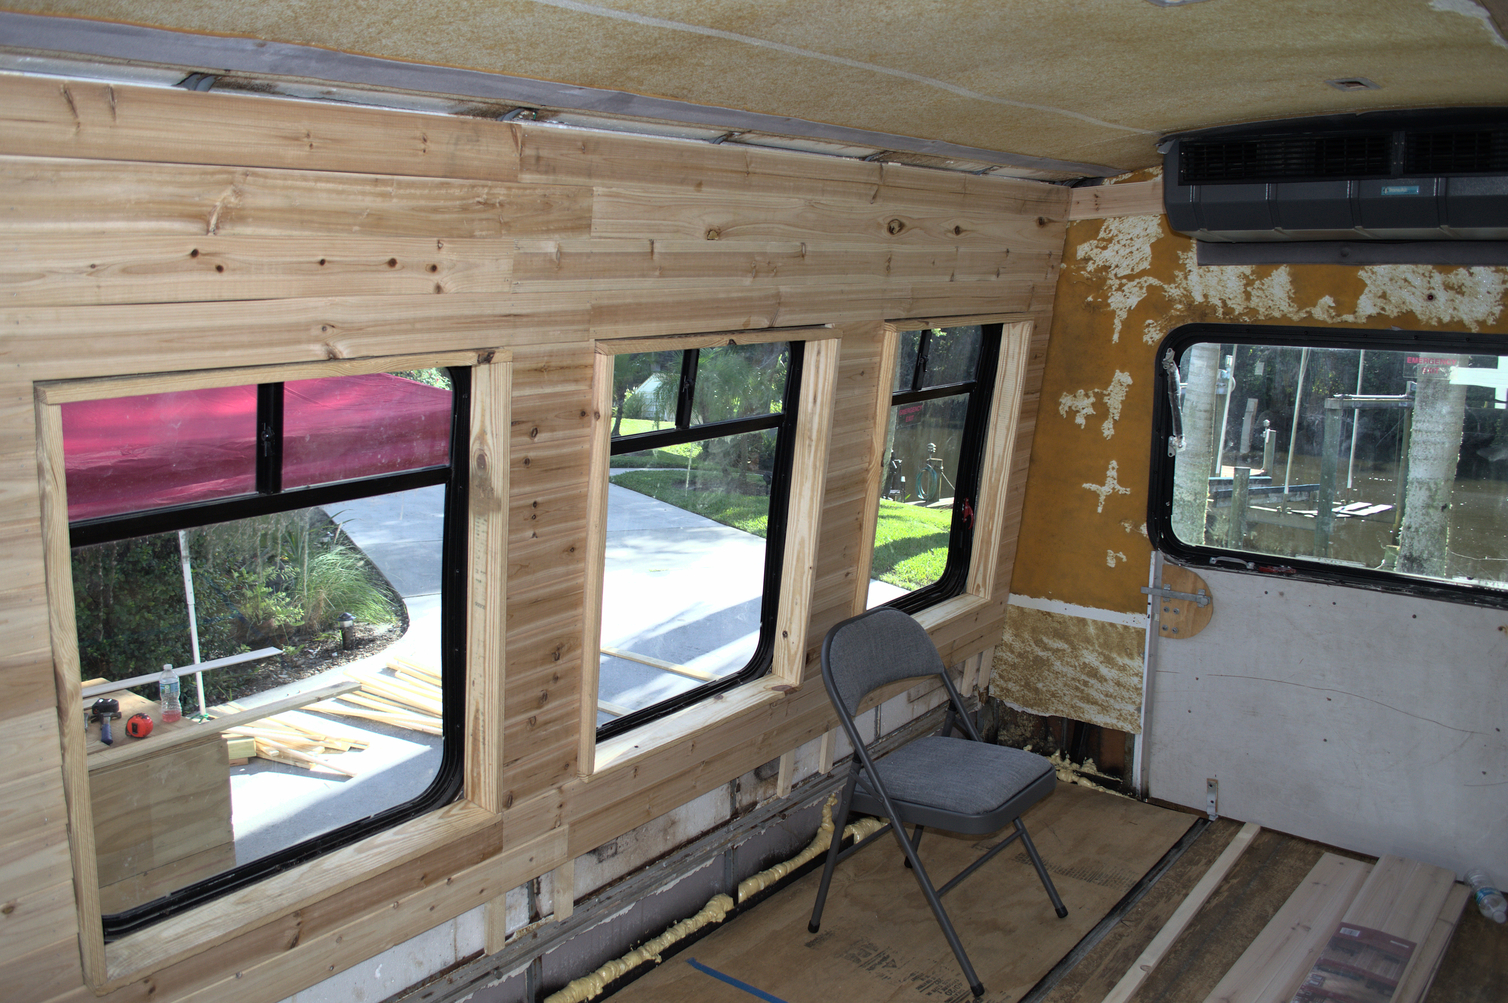
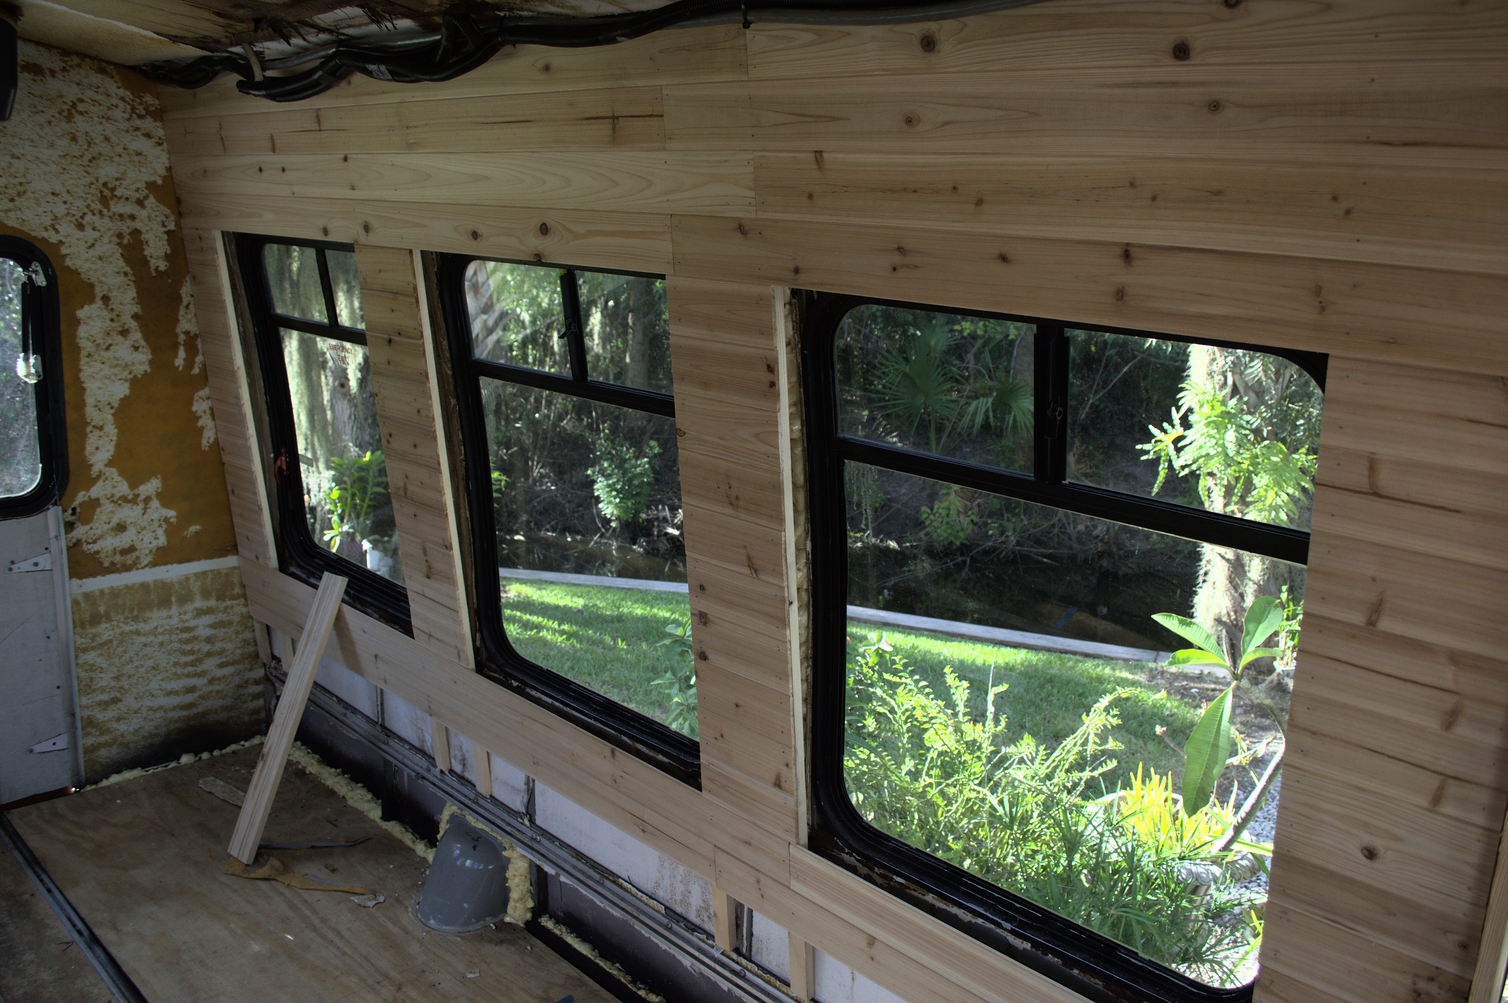
So I took everything out and began the tear down over again. Then I took the time to create a frame for the walls, and switched to Cedar Tongue and Groove rather than the underlay I was trying to use before. I’ve covered the two outboard walls so far, and built the wall that is behind the drive seat. I still have to finish the wall that is in the rear, and then I will be moving on to the roof rack! Hopefully, I’ll be finishing that back wall today, and come Monday, I’ll be on to the rack.

Pictures!

- Fun Side Note -

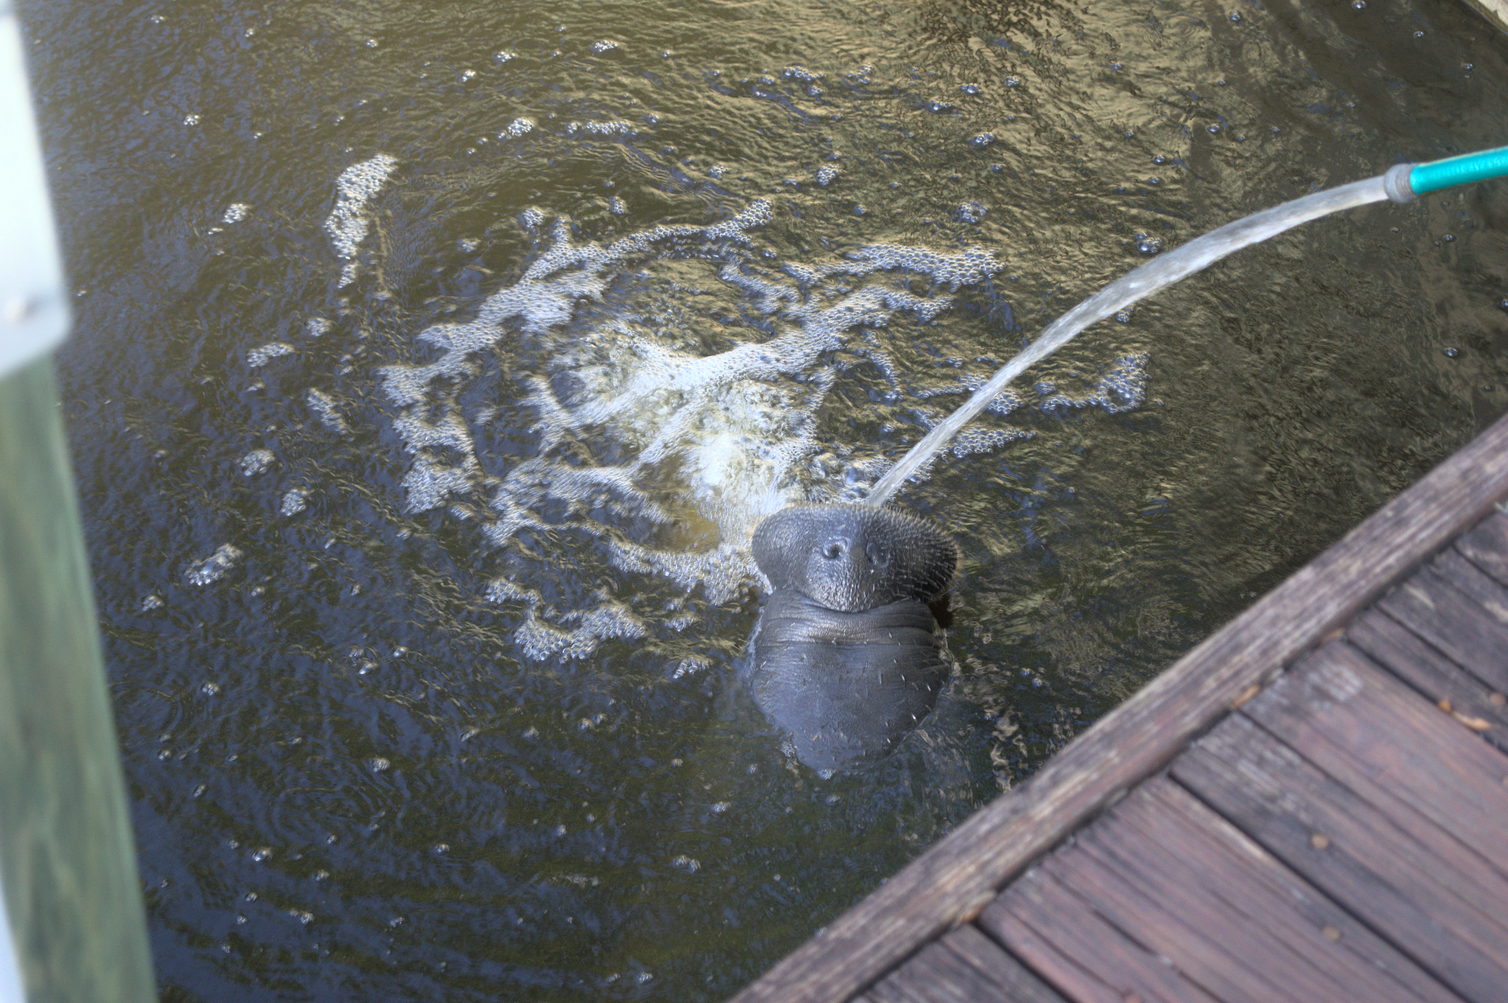
So the last three months (-ish?) I’ve been over at my parent’s new house while I finish getting ready to take off this October. (Fingers crossed) So while working on the Bus in their driveway I noticed something big under their dock. At first, I thought it was a big ol’ Turtle stuck on the pilings, but then we realized it was a Manatee! Someone told my Mother they like freshwater so we turned on the hose, and sure enough, this guy popped up! There were like 10 of them in the area, but he was the only one brave enough to come over for a drink. :smile:


- 8/29 (Friday) Update -

Got the back wall finished today (Saturday), so now I’m finally done with all the walls and will be starting on the roof rack on Tuesday! Yay, slowly coming together!

2 Likes

Looks great! I’m looking forward to seeing your progress.

1 Like

Hey-o!

So here is the latest and greatest from… Still haven’t named the Shuttle yet… Anyway, here’s what I’ve gotten done the last month or so!

^- Put in some new steps (sorta).

Fun Side Note - If you look to the right of the above picture, you can see the corner of the “Dog House” looking thing I built from my older pictures! Even though it will no longer be going into the Bus, I’ve been using it as a workbench and it’s been great! Sadly after this is all done though I have to throw it away as nobody wants it. :laughing:

^- Removed the old poles, repainted the door opening/closing mechanism, reattached the grab rails.
Behind the driver seat I am going to build a closet at some point, but first I need to replace that seat.

^- On the right is what will serve as a bench most of the time, but also a second bed if necessary. That open area at the end is where my fridge will go, it’ll be one of the “cooler fridge” type designs so it’ll slide in and out.

^- The Bench also has storage inside of it.

^- Under the bed, I’ll eventually house my batteries on the right side, and the middle/left side will be left open for storage. I was originally going to keep my 55 gallon tank inside on the left side of the bed, but decided against it as there was no real benefit, so now it will be mounted underneath same as most tanks.

^- Here you can see what will be the shower. To the right of that, the open space, that is where I will be building “cabinets” (sorta) to house my sink as well as my camping stove/oven. I’m going to be picking up that same stove/oven you see everyone else using, I really wanted to be able to bake. Since there will most likely be no space left over for “counter space”, I’m thinking of picking up some Butcherblock Counter and putting it on a hinge so I can just fold it up when I need it.

^- Shower again, a little more clearly this time.

^- As you can see I’m currently sealing the edges of the panels with silicon to prevent leakage, the panels themselves are waterproof but I have also added a special clear sealant to them as well. Once completely sealed with the silicon I plan to color match it to the grout in the panel so that it blends.

^- Here you can see the custom drain pan I ended up putting together, for those following the post you might be wondering where the actual shower stall I had went. After a lot of debate, there was just no way to really make that work with the curvature of the Shuttle Bus walls so sadly it was unusable. Instead I’ve made my own shower drain here because they didn’t have the size I wanted in circulation. As you can see, eventually I will be creating a river pebble floor. I will be using a silicon/rubber material instead of actual grout to avoid cracking and such. Eventually I’m even going to add a fold down Bamboo Seat and a extremely large “rain fall” type shower head. I should be doing that this upcoming month (October), so I’ll post photos of that soon as well.

Sadly, I did take a few steps back as well though. I had gotten the ceiling done, but apparently I missed a few roof leaks, and so after some heavy heavy rains I had too many bubbles and other damage to ignore. So I ended up ripping it all down in favor of not only plugging the leaks, but replacing the damaged panels with a different design.

1 Like

Hey-o!

Been awhile since I updated my build post, so I wanted to toss some pictures in here. These aren’t “staged” like I normally try to do with my photos, make em pretty and what not, because I’m right in the middle of starting up the plumbing/electrical so I didn’t feel like moving a bunch of stuff around.

But still, they give a pretty good idea of my progress. :smiley:


So these two show the change I made to the “bench” area. I really wanted the 12v “cooler” style fridge like most people have, but then I saw the fridge in the picture at Home Depot for $180 while the “cooler” fridge I wanted was like $400… Sooooo I bought the Home Depot one. :laughing:

Obviously, because of the change in size, I had to give up my “2nd-bed” style bench I had going on. But honestly, I don’t plan on having company 99% of the time anyway so it was a small price to pay.


Then this guy is the other big addition, I found this awesome little buffet cabinet that was EXACTLY the size of the space between the shower and the bed. I just couldn’t pass it up.
(cough I got lazy and didn’t want to build a cabinet cough)

Then on top, you can see my Pitcher Pump setup, I wanted to get away from so much heavy electrical dependence (especially with the new fridge not being the more efficient 12v). The tub doesn’t have a drain, which is pretty obvious looking at the drawers below I guess. But I wanted to be extra aware of my water usage so I figured this was a good way to do it.

Plus then I can keep the water from getting all nasty and sitting in a jug, instead, I can dump it on some plants or what not! (I use plant-based soap, so no residue build-up)


I also painted the Bus!


I have a bunch of “Military Metallic Green” vinyl wrap that I was originally going to use, but the logistics of trying to use it were too much for me to want to bother. So instead I picked up the heavy-duty Rustoleum paint that protects against rust and what not.

If you look closely you can see some overspray and stuff in these photos, but these are actually old and I’ve since painted over all that and “cleaned” it up.
(I also replaced that broken light on the side in the 2nd picture of the exterior. :stuck_out_tongue:)

I don’t have pictures of it on the computer, but I also completely resealed the roof with Plastidip, or maybe it was that other plastic paint brand… Can’t remember now, but the whole roof has been resealed too, and should last for years to come. Take that leaks! :triumph:


Well, that’s about it really. Plumbing and Electrical this month, and then I’m heading out on the 1st of December! There is still a good deal of stuff I want to get done, but after the plumbing/electrical, it’s all stuff I could do on the road.

Alrighty, until next time!

Wow. That looks great! :slight_smile:

1 Like

Greetings!

Looks like you’re making good progress!

Cheers!


"Opportunities are everywhere, but only action makes it happen." ~ Van_Dweller


1 Like

Hey-o!

Not a “ton” of visual progress as I try to get the plumbing/electrical finished up, but a few photos of what has gotten done.


Got the ceiling finished up, for the most part anyway. Still gotta do “trim” eventually, but for the moment it’s enough to get on the road with. While I like the cedar look, I do think it’s a bit plain, so I might add some stain or color down the road to spice it up a bit.


Got my propane water heater for the shower mounted, I really didn’t want it on the back like this but I just couldn’t find a better solution. I considered putting it inside with a flue on it to vent out the exhaust but just didn’t think it was worth it. It does still need a flue though, or it’ll melt that tail light. :laughing:


A lot of the plumbing for the shower is in place, just needs a few pipes run. All said and done, it will run through a 40-micron mesh filter, Tank, then pump, then to a 20-micron mesh filter, then a 5-micron mesh filter, followed by another 5-micron carbon filter. Then it will hit the hot water heater, and finally a UV filter to make any bacteria inert. The UV filter is inside, tucked behind the blue buffet, for safety reasons.


That’s about it for the moment, the electrical is 60-70% done but I don’t have any pictures of it yet.

Hope everyone is well, stay safe! :smiley:

1 Like

Greetings!

Looks like you’re making good progress!

Cheers!


"Be the reason someone smiles today!" ~ Van_Dweller


1 Like

We don’t all have ‘plenty of time’!! What gives you that idea…some of us have busy lives and busy jobs…! Lucky if you do though…

I have a ‘94 Ford diesel shuttle!!! Did yours come with a rear door? Or did you install one?…

So in the spirit of my original post, I just thought I’d put my final update out there.

I’ve been traveling with this bus now for two years, largely staying on farms through the “Workaway” program.

It has been so much fun, and such a great experience. I’ve learned so many things and met so many new friends. But at last, the time has come to sell my Shuttle.

During my travels, I picked up a travel partner whom I now intend to marry, and together we’ve worked towards setting aside the money to get our own farm. This has been a goal largely accomplished due to the kindness of these farms, and this wonderful minimalist lifestyle with my Shuttle.

So top things I’ve learned in two-ish years of Vanlife/Buslife/Nomad Life…

  • Don’t bother with overly complicated fancy stuff, like recirculating showers. As you can see from my most recent update of the bus interior (pictured below), that $3000 shower was turned into a closet. The closet is WORLDS more useful than that stupid shower ever was.

  • Keep cooking simple, I bought a Ninja Foodi Pressure Cooker and it is hands down the only appliance you need for cooking. I turned all the rest of that space into just dry food storage and it’s been great. No pots, no pans, no fuss or mess. I never got into Influencing because how could I live a minimalist lifestyle but then try to convince others they needed to cram their vehicles full of junk? But I tell you what, that Ninja Foodi has been amazing. I will most certainly stand by that product as incredibly useful in the Vanlife lifestyle.

  • Summer sucks, either make sure you insulate A LOT or don’t plan on being in your bus during the day. I got a floor AC that ended up spiking the electric one month (It was during that weird heatwave too, over the summer of 2022) for one of the farms I was on, just to try and keep it cool during the day. They were really nice about it, but even after all that money spent, it was still like 90 degrees in the bus during the day. (WITH the AC running)

  • Don’t live IN a vehicle, live OUT OF the vehicle. I’ve met so many amazing people (some annoying too, haha) not just traveling but getting involved. Farm work through Workaway is amazing, just avoid the ones looking for cheap free labor. There are good places with good people, and being a part of those places has been the best part of my last two years.

  • Plan for emergency maintenance, and have money set aside for it. So far I’ve got about $33k into the bus, total from purchase to the final build that I have right now. While that’s actually less than what I would have spent for an apartment in my hometown for the last two years, it did at times get a bit costly in sudden large bursts.

So while I hate to, now it’s time to sell the Shuttle. I’d rather let someone else get the opportunity and experience I did than let it sit on the farm I intend to buy, just rotting into dust. So that’s my story people, forget the glamour that Instagram and Tickle Tok make it out to be, that stuff isn’t real. But I assure you, from my own personal experience, that it can be an amazing journey.

Safe travels, all!

  • Rydel


1 Like

It did not come with a rear door, but I was actually not the one to cut it. The Gentleman that I purchased it from had already cut it.

Not that I open it often, but it has always worked well! :slight_smile:

1 Like

Wow I really LOVE this post! Getting down to basics of what you really NEED is my philosophy as well!
And what a fantastic story of your journey! Wish you well on your new farming chapter!
Thanks for sharing!

Rydel! I am so happy to find your post in this forum. Purchased a 1999 Ford Truck E350 Super Duty Van 5.4L FI SOHC 8cyl this past April. I’ve stripped my roofing off of the industrial foam and some of the plywood.

I found leaks and moldy areas hence the stripping so I could bust the rust as well. How did deal with the fiberglass/aluminum roofing? You mentioned “hit it with loads of Ospho, sealed it with rubber spray, lined the edges with great stuff to help fill exposed gaps, and finally put the floor down with metal screws and wood glue.”

As already mentioned, I greatly appreciate your progress pics to guide me forward. Thank you in advance!


IMG_6985

Greetings & Welcome!

I tend to handle things differently but oh well, the damage has already been done…

I seal everything from the outside, then only repair visible damage on the inside. An ozone generator will kill any mold issues, even hidden mold. If it’s structurally sound, I stop there.

Most hardware stores will have some form of rust converter, follow the directions, then prime & repaint using rustoleum.

I can’t really tell 100% by your pictures, and all these things are different, but it looks like the purpose of the wood is to strengthen the roof. If that’s the case, I would say that it needs to be replaced due to damage inflicted to it. Make sure you add full width shims between the wood and the beams, on both the front & rear sides of each beam. The roof needs to be very solid, with no give/flex under that fiberglass. Otherwise any weight or a tree branch could crack/break it. It what’s on the inside giving it it’s strength, not the thin fiberglass itself. Follow that up with foam insulation panels, to the thickness of the ribs, then finish it off with waterproof paneling.

DO NOT tear into the walls or floor!!! Add to them if you like, but unless there is visible catastrophic damage, it is best to just fix or hide the visible damage. Things like what you’ve done to the roof can make the whole vehicle less stable, and even alter it’s driving safety. These were engineered the way they were following strict safety standards, and you NEVER want to mess with that, it’s structural. Luckily for you, yours has ribs, while many don’t. Your’s can be fixed good as new, just a whole lot of likely unnecessary work.

Cheers!


"Old school, cheap, simple, reliable, and easily replaceable for the win!" ~ Traveler@Heart